
12 Make Outdoor Play More Fun With a DIY Mud Kitchen for Kids
Introduction
A DIY mud kitchen gives kids the kind of backyard play they never seem to forget. It is messy in the best way, full of scooping, pouring, stirring, washing, pretending, and making little “recipes” from leaves, stones, dirt, petals, and water. For USA families, it is also a smart way to create screen-free play without buying a large plastic playset or redesigning the whole yard. A simple setup can turn a fence corner, patio edge, or empty garden strip into a creative outdoor station children use again and again.
The best part is that a mud kitchen does not need to look perfect. It needs to be safe, sturdy, easy to clean, and interesting enough for kids to explore. A few bowls, a low counter, a water source, storage crates, and nature supplies can create hours of play. Parents often want something that looks cute near the patio, while kids want a place that feels real. A good design does both. It gives children freedom while keeping the mess in one planned area.
This guide shares practical ideas for building a fun Kitchen Outdoor play setup with simple materials. You will find easy layout tips, useful storage ideas, sensory play details, and styling touches that look beautiful in photos but still work in real life. These ideas are made for backyards, patios, decks, side yards, and small outdoor spaces. Save the ones that fit your home, then mix them into a mud kitchen your kids can actually use, clean, and enjoy through warm afternoons, weekends, and school breaks.
1. Backyard Prep Counter
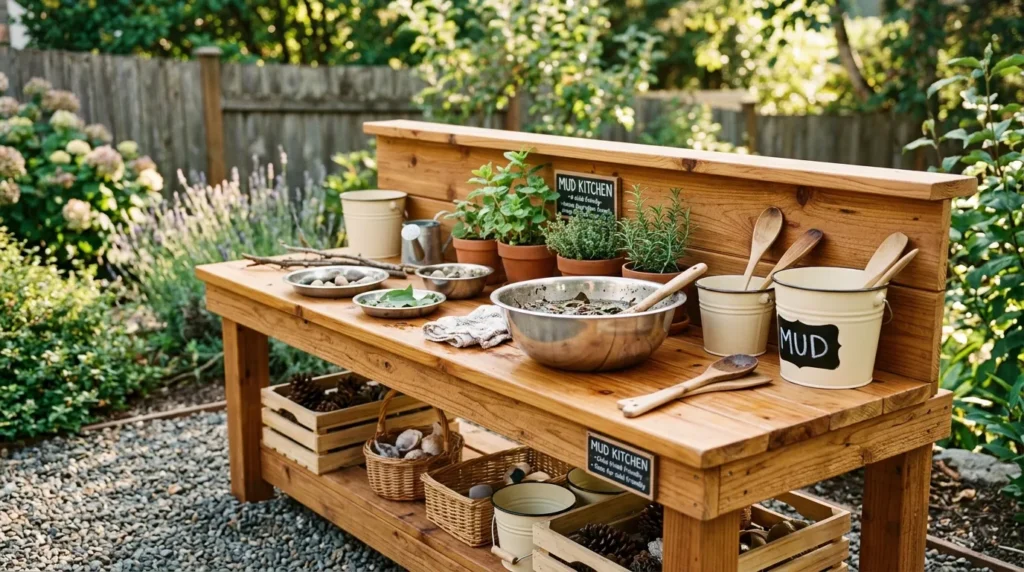
- Build one main counter first, because it gives children a steady place to mix mud pies, line up bowls, and create pretend meals.
- Use cedar boards, pine planks, sealed plywood, or an old tabletop, but sand every edge carefully before children start using it.
- Keep the height close to your child’s waist so they can stand naturally without stretching, bending too much, or losing interest quickly.
- Add a small raised back strip to stop cups, leaves, spoons, and muddy bowls from sliding behind the station during active play.
- Choose a natural stain or soft paint color if the mud kitchen will sit near a patio, deck, or garden seating area.
A simple counter is the heart of every good mud kitchen. It gives children one clear place to stir, press, scoop, decorate, and pretend they are running a tiny backyard café. You can build it from new lumber, old fence boards, or a reclaimed tabletop fixed to a sturdy frame. In my experience, children use a mud kitchen longer when the surface feels roomy and comfortable. A counter that is too high, too narrow, or too wobbly can make play frustrating before the fun really begins.
The counter also makes the whole backyard play area look more planned. Instead of bowls and tools spreading across the lawn, everything has a working surface. Seal the wood with an outdoor-safe finish, then add a lower shelf for buckets, pans, and extra supplies. If you want a softer look, pair warm wood with cream bowls, galvanized pails, and a few small plants nearby. The result feels handmade, useful, and charming without needing expensive building materials or a complicated weekend project.
2. Double Basin Sink

- Add two removable bowls so children can separate clean water from muddy water, washed stones from dirty leaves, or pretend dishes from ingredients.
- Use stainless mixing bowls, plastic tubs, enamel basins, or shallow metal pans, depending on your budget and your child’s age.
- Cut openings carefully if you want the basins set into the counter, or place them on top for a no-cut beginner version.
- Keep one small towel, cup, and scrub brush nearby so the sink feels useful instead of just decorative.
- Empty both basins after play to prevent standing water, mosquitoes, unpleasant smells, and slippery mud around the station.
Two basins make water play feel more purposeful and less chaotic. One bowl can hold clean water for rinsing leaves and stones, while the other can hold muddy mixtures, pretend soup, or “dirty dishes.” This simple setup helps children understand sorting, washing, transferring, and sequencing during play. Use stainless mixing bowls if you want durability, or shallow plastic tubs if younger children need easier reach. That’s why many designers recommend removable basins for outdoor play spaces. They are safer, cheaper, and much easier to clean than fixed plumbing.
The transformation is small but noticeable. A double sink makes the mud kitchen feel like a real working station, especially when paired with a little towel hook and scrub brush. If you are not ready to cut holes in the counter, simply place the basins on top and frame them with a low wooden edge. After play, lift them out, rinse them, and store them upside down. This keeps the area cleaner and helps parents reset the space quickly before dinner, errands, or the next backyard play session.
3. Loose Parts Pantry
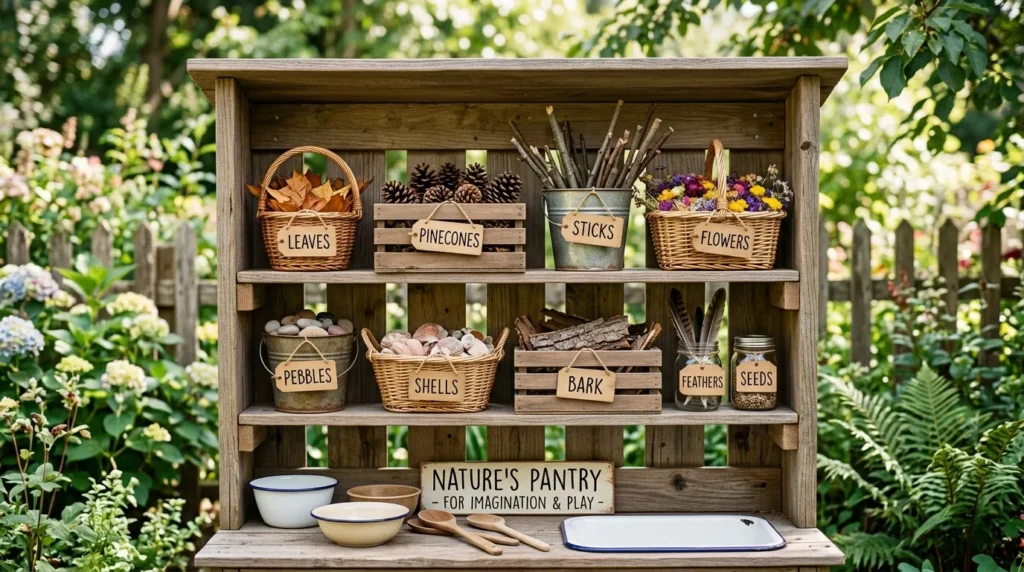
- Use small baskets, crates, trays, or metal pails to hold leaves, pinecones, shells, bark, sticks, pebbles, flowers, and seed pods.
- Sort materials by type so kids can choose ingredients easily and create more detailed pretend recipes during outdoor sensory play.
- Add picture labels for younger children and written labels for older kids who are beginning to recognize words and categories.
- Rotate the pantry with the seasons, using petals in spring, herbs in summer, acorns in fall, and pinecones in winter.
- Check natural materials often for sharp edges, insects, thorns, mold, or tiny pieces that may not be safe for younger children.
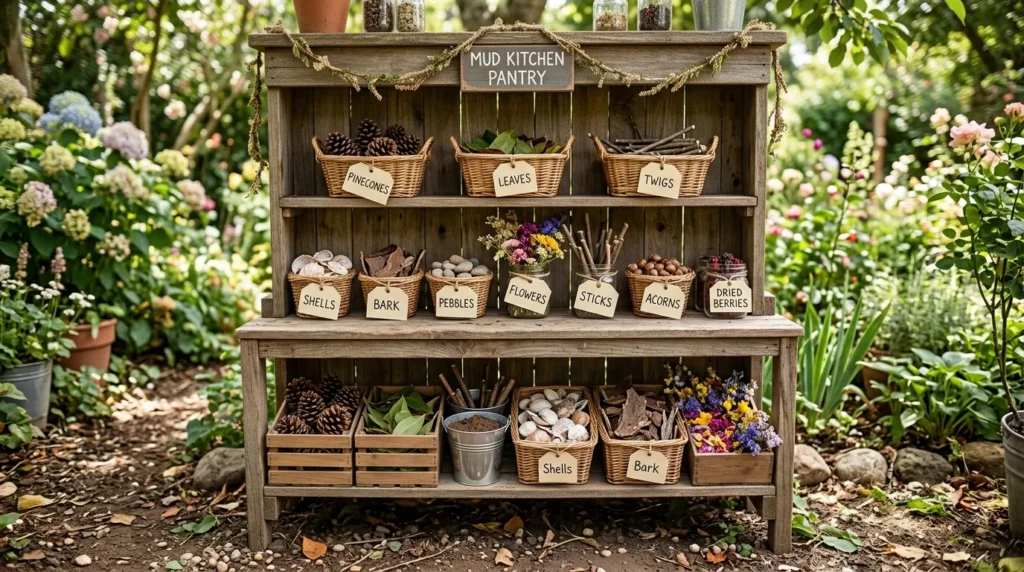
Loose parts make a mud kitchen feel alive because the play changes every day. A basket of leaves, pinecones, pebbles, shells, bark, and flowers gives children endless pretend ingredients without buying plastic food. They can sort, count, crush, sprinkle, stack, and decorate their mud pies in different ways. I’ve noticed that kids become more creative when materials are organized but not overly controlled. A small outdoor pantry gives them choices while still keeping the yard from turning into one big pile of scattered nature bits.
This idea works especially well beside the counter or on a low shelf. Use small crates, metal pails, divided trays, or baskets that can be carried around the yard. Add simple labels such as sticks, stones, leaves, and flowers so cleanup becomes part of the routine. Rotate the contents through the seasons to keep the station interesting. In fall, add acorns and dried leaves. In summer, add herbs and petals. The pantry becomes a natural learning area that supports sorting, language, texture play, and independent cleanup.
4. Pouring Water Shelf
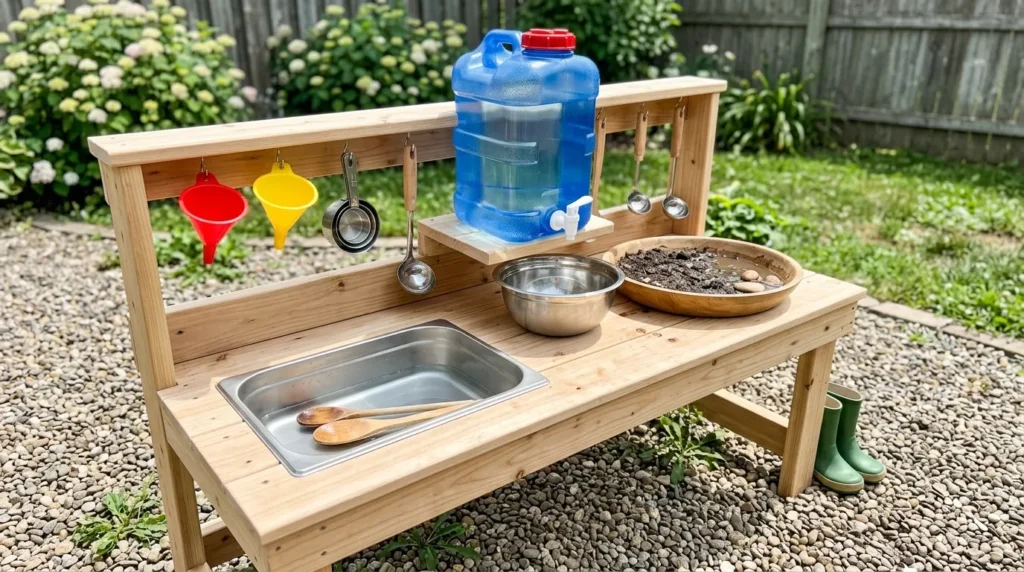
- Place a refillable water container on a sturdy shelf so children can pour small amounts without needing constant access to the garden hose.
- Use a camping jug, drink dispenser, small bucket with a spigot, or covered water container that can be cleaned easily.
- Position the shelf above a basin, tray, or gravel area so drips land in a controlled spot instead of flooding the grass.
- Add measuring cups, funnels, ladles, and small pitchers to support pouring practice, early math skills, and pretend cooking.
- Refill only a set amount for each play session if you want to reduce water waste during hot or dry weather.
A pouring shelf gives kids independence without turning the yard into a swamp. Instead of handing over the hose, set a small water container above the sink or mixing area. A camping jug, drink dispenser, or bucket with a spigot lets children control small amounts of water for recipes, rinsing, and experiments. This is especially helpful in dry states where water play needs limits. Kids still get the joy of pouring and mixing, but parents can decide how much water is available before the play session begins.
The shelf also gives the mud kitchen a real working rhythm. Children fill cups, pour into bowls, wash stones, and test what happens when dirt gets wetter or thicker. Add funnels, measuring cups, and small pitchers to make the station more hands-on. Place the water shelf over gravel, a basin, or a washable tray so drips stay contained. After play, empty the container and let it dry. This keeps the setup cleaner, safer, and easier to manage through warm weekends and busy school afternoons.
5. Mud Mixing Table
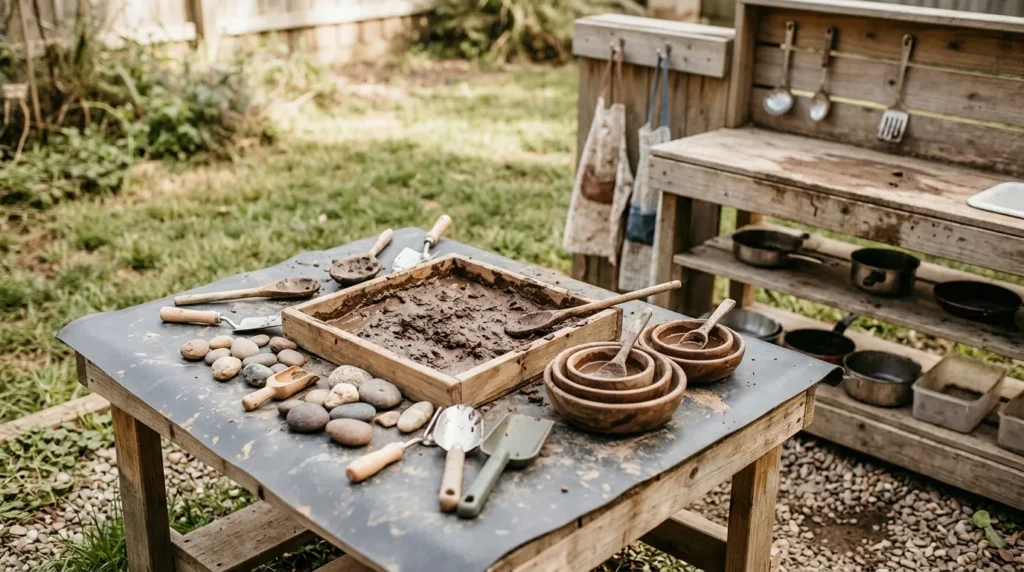
- Add a lower side table or tray just for mud mixing so the main counter stays usable for bowls, tools, and finished creations.
- Use an old coffee table, child-size table, wooden crate, plastic activity table, or shallow cement mixing tray for this zone.
- Keep the mixing surface washable and slightly separate from storage so wet mud does not cover every spoon, cup, and basket.
- Place scoops, small shovels, and sturdy spoons nearby so kids can dig, transfer, pat, and shape mud more easily.
- Choose a darker surface or removable tray if you want muddy marks to look less obvious between deeper cleanups.
A separate mixing table keeps messy play fun instead of overwhelming. When children have one lower surface just for dirt, water, and thick mud, the main counter can stay open for serving, sorting, and decorating. You can use an old coffee table, child-size table, wooden crate, or plastic activity table. A shallow cement mixing tray also works well because it holds moisture without leaking everywhere. In my experience, this small separation helps kids play longer because the station does not become crowded within the first ten minutes.
The setup feels more useful when each area has a job. The mixing table can hold mud, scoops, small shovels, and stones, while the counter can hold bowls, pretend menus, and finished pies. This creates a natural play flow from mixing to decorating to serving. Choose a washable surface and place it near gravel, mulch, or a mat for easier cleanup. A darker tabletop hides stains better, while a removable tray lets parents rinse the mess quickly. It is simple, practical, and easy to upgrade later.
6. Stone Path Base
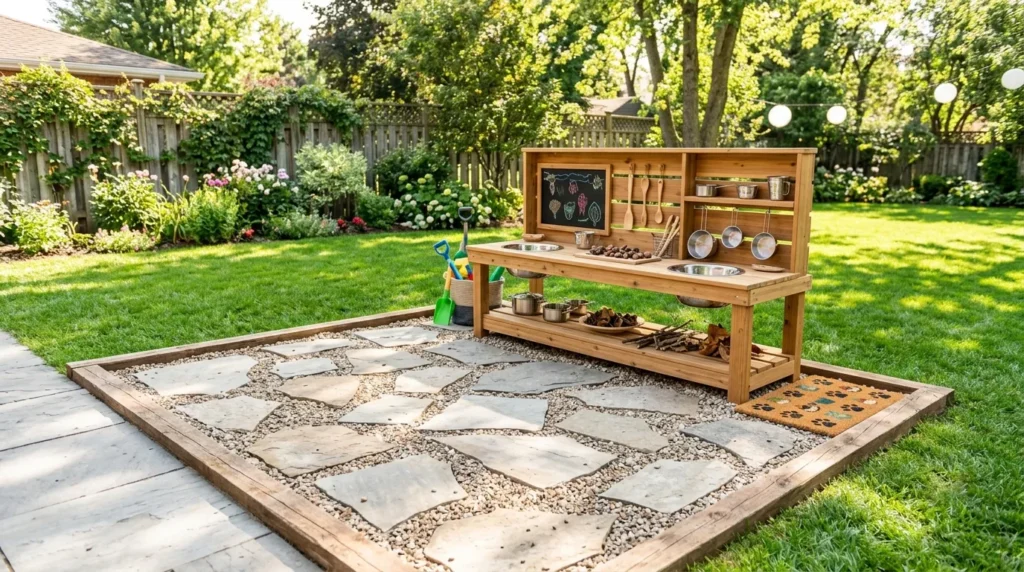
- Build a clear floor zone with stepping stones, flat pavers, pea gravel, or flagstones so the mud kitchen feels planned and safer.
- Add landscape fabric underneath gravel to reduce weeds and keep the surface easier to maintain through rain, sprinklers, and regular play.
- Keep stones flat and stable because children will carry bowls, water, tools, and trays while moving around the station.
- Frame the area with timber, brick, or garden edging so gravel and loose materials stay in place around the play zone.
- Use lighter stones in sunny yards because dark surfaces can become hot under strong summer sun in many USA regions.
A defined base makes a mud kitchen feel like a real backyard destination. Instead of placing everything directly on grass, create a small floor with stepping stones, pea gravel, flat pavers, or flagstones. This improves drainage, reduces slippery patches, and gives kids a clear boundary for messy play. It also protects grass from becoming worn down near the counter. That’s why many outdoor play designs begin with the ground plan first. A safe, stable base makes every other part of the mud kitchen easier to use.
The visual upgrade is just as strong as the practical one. A stone or gravel floor frames the play station and helps it look intentional from the patio, deck, or kitchen window. Add timber edging or brick borders to keep loose gravel contained. If your yard gets harsh afternoon sun, choose lighter stones that stay cooler under small feet. Add a washable mat at the exit point so children can wipe shoes before running indoors. This one detail makes outdoor play feel more organized for the whole family.
7. Fence Storage Board
- Mount a sturdy board, peg panel, or old fence section behind the mud kitchen to hold tools, baskets, signs, and small shelves.
- Use hooks for ladles, strainers, cups, and brushes so the counter stays open for mixing, pouring, and pretend serving.
- Keep heavy items low or off the board completely so nothing falls onto children during active play or windy weather.
- Paint the board in soft green, clay, white, gray, or natural stain to blend with the yard and garden style.
- Secure the board firmly to posts, a fence, or a freestanding frame so it never wobbles, leans, or tips.
A fence storage board turns a plain wall into a working part of the play space. Instead of keeping every spoon, cup, sign, and basket on the counter, you can hang them vertically where children can see and reach them. Use a peg panel, old fence section, wide board, or painted plywood mounted securely behind the station. This keeps the play surface open and makes the whole setup look tidy. It also helps small yards because storage goes upward instead of spreading across the ground.
The board can be both practical and pretty. Add hooks for utensils, a small shelf for chalk, a basket for pinecones, and maybe a tiny sign above the sink. Paint it sage green, soft white, warm gray, or natural brown to match your backyard. Keep heavier items low and avoid anything sharp or breakable. When each tool has a visible place, children learn to clean up more independently. The mud kitchen also photographs better because the backdrop gives the scene shape, height, and texture.
8. Pretend Café Sign
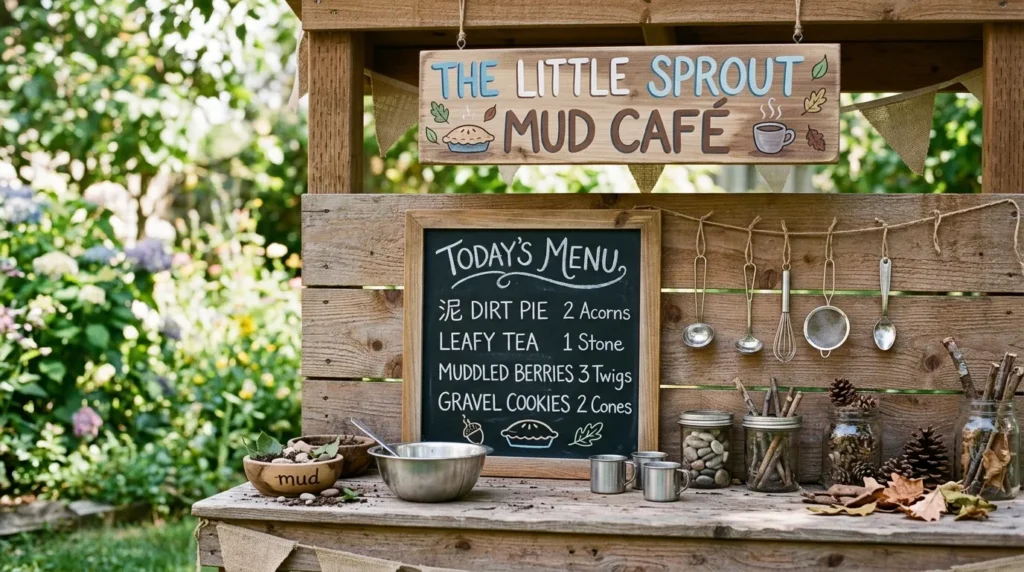
- Add a small handmade sign to give the mud kitchen a playful identity, such as Mud Pie Café, Garden Soup Bar, or Backyard Bakery.
- Use scrap wood, chalkboard paint, canvas, or a sealed cabinet door to create a sign that can handle outdoor use.
- Keep the lettering large and simple so children can recognize the words and parents can read it clearly in photos.
- Let kids help choose the name, paint the border, or draw little food icons to make the space feel personal.
- Mount the sign above the counter or on the side panel where it adds charm without blocking shelves or tools.
A pretend café sign gives the mud kitchen a story before play even begins. Children love spaces that feel like their own, and a simple sign can turn a wooden counter into a bakery, soup shop, garden café, or mud pie stand. Use scrap wood, chalkboard paint, or a sealed cabinet panel for the base. Let kids help name the space if they are old enough. I’ve seen this work well in many homes because a named play area feels more special and easier to return to.
The sign also adds a strong visual point for Pinterest-style backyard photos. Keep the lettering clear, large, and playful, then add small drawings of leaves, pies, spoons, or flowers around the edges. A chalkboard sign is flexible because children can change the menu or café name whenever they want. Mount it above the counter, on a fence board, or beside the tool rail. It is a small project, but it makes the whole mud kitchen feel warmer, more personal, and more connected to imaginative play.
9. Covered Shade Nook
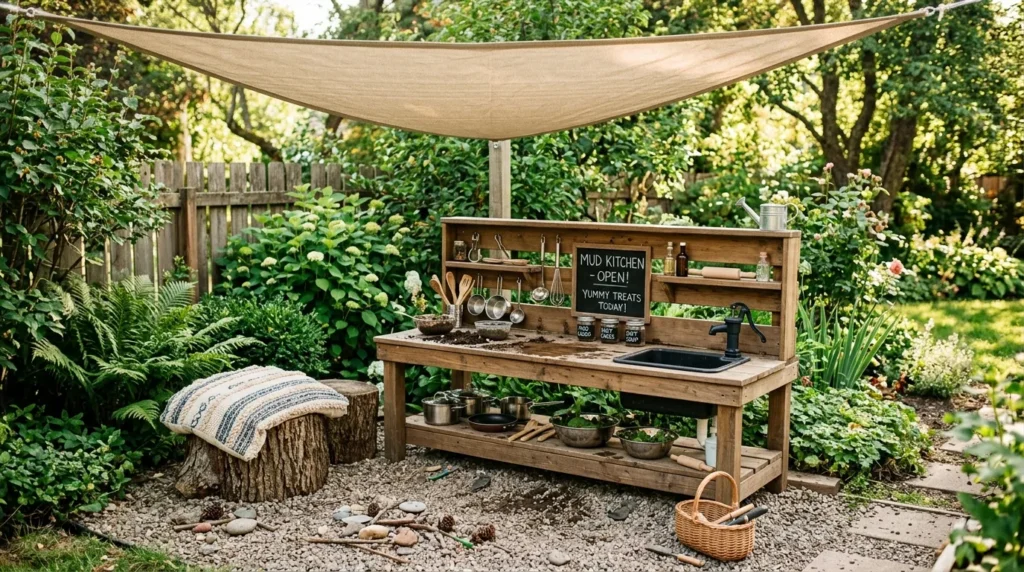
- Add a shade sail, patio umbrella, small canopy, pergola panel, or canvas cloth so kids can play longer on warm afternoons.
- Angle fabric slightly so rainwater runs off instead of pooling in the center and pulling on the support points.
- Choose neutral canvas for a calm garden look, stripes for a cheerful summer feel, or soft green for a nature-inspired corner.
- Keep shade fabric away from grills, fire pits, sharp branches, and anything that could damage the material or create safety issues.
- Add a stump seat, small bench, or outdoor cushion nearby so children can rest between mixing, washing, and pretend serving.
Shade can decide whether the mud kitchen gets used for five minutes or a full afternoon. A covered nook protects children from harsh sun, keeps the counter cooler, and makes the space feel like a tiny outdoor room. Use a shade sail, patio umbrella, canvas cloth, or small pergola panel depending on your yard. Secure the material well and angle it so rainwater runs off. In sunny parts of the USA, this feature is not just decorative. It makes the play area more comfortable and usable.
The mood changes as soon as shade goes up. The corner feels softer, calmer, and more inviting from the house or patio. Neutral canvas creates a natural look, while stripes add a cheerful summer feeling. Add a small stump seat or bench under the edge so children can pause between recipes. Keep fabric away from grills, fire pits, and rough branches. When the shade is planned well, the mud kitchen becomes a cozy backyard nook instead of a toy station sitting in direct sun.
10. Rolling Supply Cart
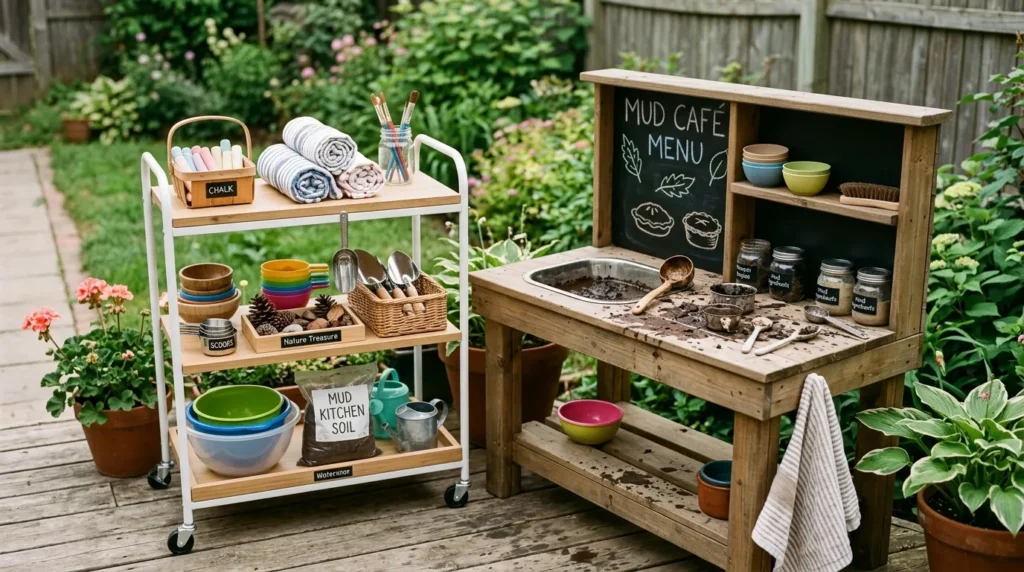
- Use a small rolling cart to hold extra bowls, towels, chalk, cups, nature supplies, and seasonal play trays near the mud kitchen.
- Choose a cart with washable shelves, sturdy wheels, and enough weight at the bottom so it does not tip easily.
- Roll the cart indoors, into the garage, or under a covered patio when storms, snow, or strong wind are expected.
- Organize each shelf by use, such as tools on top, nature materials in the middle, and cleanup items on the bottom.
- Add small bins or baskets to stop loose items from sliding around when the cart is moved across the patio.
A rolling cart makes the mud kitchen easier to use and easier to reset. Instead of storing every extra bowl, towel, and supply outside all the time, keep them on a small cart that can move with the play. A washable metal or plastic cart works best because it can handle dirt and water. Place tools on the top shelf, nature materials in the middle, and cleanup items at the bottom. This keeps the main station simple while still giving children plenty of choices during play.
The cart is especially useful for families with changing weather. You can roll it into the garage, mudroom, or covered patio when storms are coming, then bring it back out when kids want to play. Add small bins so cups, chalk, stones, and scoops do not slide around while moving. A cart also works well for renters because it adds storage without attaching anything to the fence. It keeps the play area flexible, tidy, and ready for both quick weekday play and longer weekend sessions.
11. Rinse Off Corner
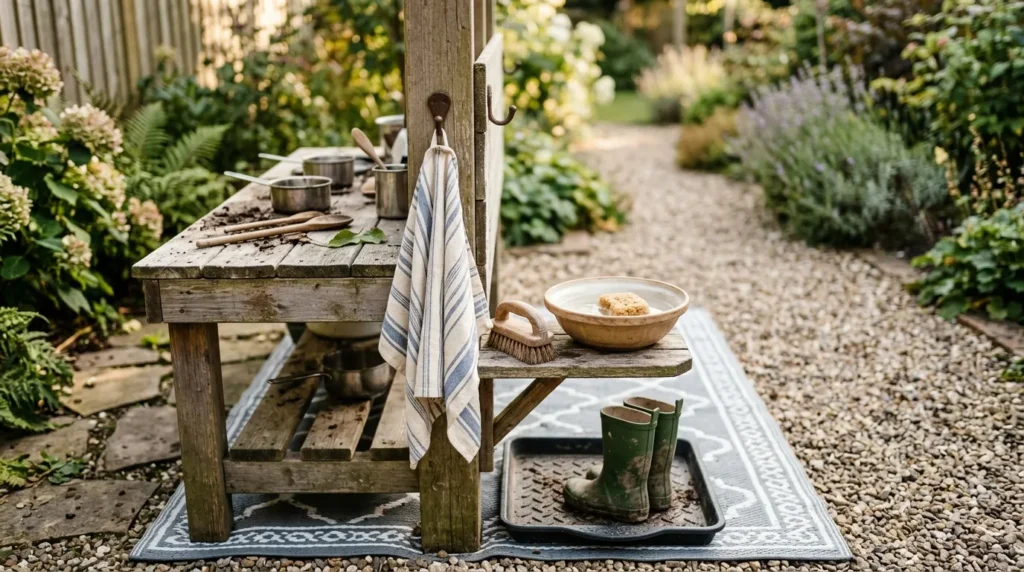
- Create a small cleanup spot near the mud kitchen with a water bowl, towel hook, boot tray, scrub brush, and washable mat.
- Place it near the path back to the house so children clean hands and shoes before reaching the porch or kitchen door.
- Use a boot tray or shallow tub for muddy shoes, especially if the play area sits close to a patio or deck.
- Hang a towel on a low hook so children can dry hands independently after rinsing tools, stones, or cups.
- Keep cleanup supplies visible because children are more likely to use them when they feel like part of the play routine.
A rinse off corner is the feature parents appreciate after the first muddy play session. It gives children a clear place to wipe hands, rinse tools, brush shoes, and leave muddy items before running inside. Use a boot tray, shallow tub, towel hook, scrub brush, and small water bowl near the exit path. This setup is simple, but it protects floors, porch rugs, and patio furniture. It also teaches children that outdoor play includes caring for the space when they are finished.
The best cleanup zones feel like part of the mud kitchen, not an afterthought. Place the rinse area where children naturally leave the play space, such as beside the deck steps, patio door, or garden path. Add a low hook for towels and a small bin for dirty utensils waiting to be washed. Choose washable materials so everything can be rinsed quickly. When cleanup takes five minutes instead of twenty, parents are more likely to keep the mud kitchen open for regular outdoor play.
12. Seasonal Play Trays

- Prepare simple trays for different seasons, using flowers and herbs in spring, shells in summer, leaves in fall, and pinecones in winter.
- Use shallow baskets, muffin tins, metal trays, or plastic divided containers so materials stay sorted and easy for children to explore.
- Add child-safe tools like scoops, tweezers, cups, spoons, and brushes to encourage sorting, counting, pouring, and pretend cooking.
- Keep trays small enough to reset quickly, especially if you want to change themes often without creating extra cleanup work.
- Store seasonal materials in labeled bins so you can bring them out again the next year without starting from scratch.
Seasonal trays keep a mud kitchen exciting without rebuilding anything. A spring tray might include petals, mint, and tiny flower pots, while a summer tray could hold shells, smooth stones, and bright cups. Fall can bring leaves, acorns, and cinnamon-colored seed pods. Winter can include pinecones, evergreen sprigs, and wooden scoops. These trays give children fresh inspiration while using materials that already match the season. They also make outdoor play feel connected to nature instead of relying on the same tools every day.