12 These Mud Kitchen Ideas Will Transform Your Backyard
Mud Kitchen Ideas
A backyard can feel completely different when kids have one special place where mess is allowed. A mud kitchen gives children the freedom to mix soil, pour water, collect leaves, wash stones, decorate pies, and invent little outdoor recipes without needing screens or expensive toys. For many USA families, this kind of play fits real life because it works in small patios, fenced yards, garden corners, and even side yards. You do not need a perfect outdoor space to build something children will use again and again.
The best Kitchen Ideas for kids are the ones that balance imagination with everyday practicality. Parents want something safe, easy to clean, and attractive enough to sit near the patio. Kids want water, tools, bowls, dirt, shelves, signs, and little details that make the setup feel real. When those needs meet, a simple mud kitchen becomes more than a play station. It becomes a backyard café, garden lab, pretend bakery, nature shelf, and sensory play corner all in one.
This guide gives you 12 mud kitchen ideas that can transform a plain outdoor area into a creative play zone. Each idea includes simple materials, layout tips, styling notes, and real-use suggestions. You can build one feature at a time or combine several ideas into a larger backyard setup. The goal is not to create a perfect showroom piece. The goal is to build a safe, charming, child-friendly space that invites messy play and still feels manageable for parents.
1. Backyard Café Station
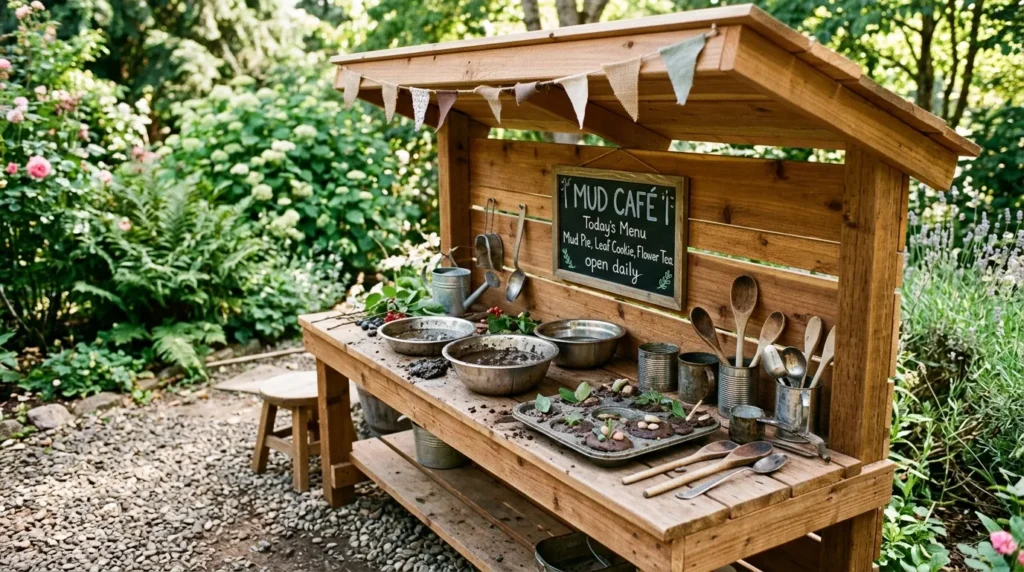
- Create a simple café-style counter where kids can mix mud pies, serve pretend drinks, and display outdoor recipes.
- Use cedar boards, sealed plywood, old fence wood, or a reclaimed tabletop for a strong child-height work surface.
- Add small bowls, muffin tins, wooden spoons, and tin cups so the space feels like a real pretend café.
- Place the station near a fence or garden wall to create a cozy backdrop and better visual structure.
- Finish the wood with exterior stain or paint so it can handle sun, rain, splashes, and muddy hands.
A backyard café station makes outdoor play feel instantly more imaginative. Instead of a plain table, kids get a little serving space where they can make mud pies, garden soup, leaf tea, and pretend snacks. Use a sturdy counter at child height, then add bowls, cups, trays, and spoons that feel real but stay safe outdoors. In my experience, children play longer when the setup gives them a role, like chef, baker, server, or customer, because the story keeps growing naturally during the afternoon.
The café look also makes the whole yard feel more designed. Add a small serving ledge, a chalkboard menu, and a basket of pretend ingredients nearby. A warm cedar finish gives the space a rustic look, while sage green or soft white paint feels sweet beside flowers and gravel. Keep the counter wide enough for two children if siblings or friends will use it together. This setup turns a forgotten corner into a little destination that looks charming from the patio and works well for daily play.
2. Window Serving Bar
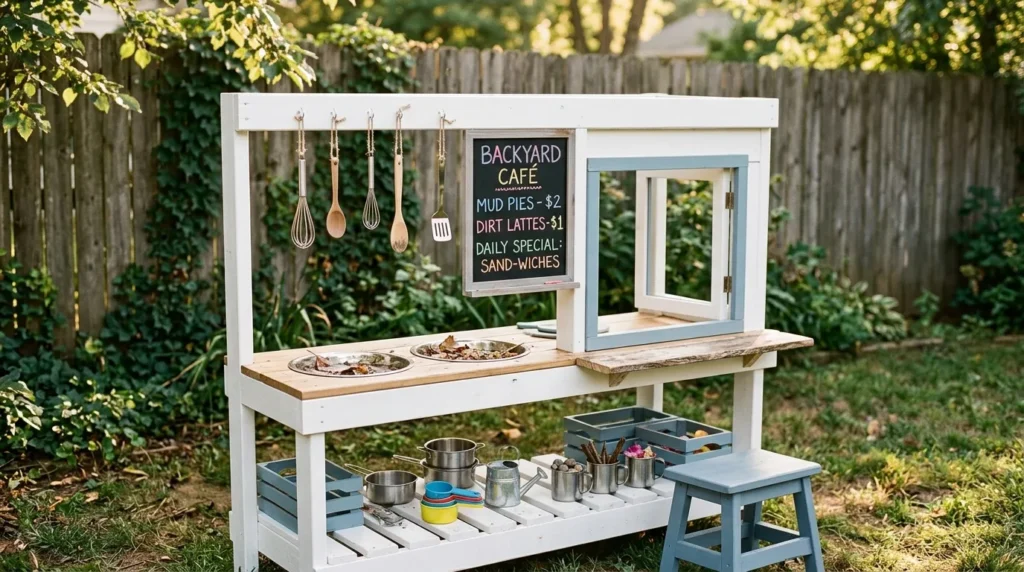
- Add a small framed window or serving opening so children can hand out mud pies, leaf soup, and garden drinks.
- Build it from scrap wood, a fence panel, an old cabinet frame, or a pallet section with a narrow shelf.
- Keep the ledge wide enough for cups and bowls, but not so deep that it blocks easy movement.
- Sand every edge carefully, especially around the window opening where children may lean or reach through.
- Paint the frame in white, blue, clay, sage, or natural stain for a playful backyard café look.
A serving window changes the way children interact with the mud kitchen. Instead of only mixing on one side, they can cook, serve, take orders, and pass pretend food through the little opening. This adds social play, role play, and storytelling without needing many extra supplies. Use a simple wood frame, old cabinet opening, or pallet backdrop with a narrow shelf attached underneath. That’s why many designers recommend small role-play features in backyard setups, because one simple structure can create many different games.
The window also gives the station a stronger visual feature. A painted frame makes the area look like a tiny outdoor café, especially when paired with a chalk sign and hanging utensils. Keep the ledge smooth and stable so cups and bowls do not tip easily. If the window attaches to a fence or back wall, secure it well so it cannot wobble during excited play. The result feels playful, practical, and photo-friendly while giving kids a clear reason to invite parents or siblings into the game.
3. Garden Ingredient Shelf
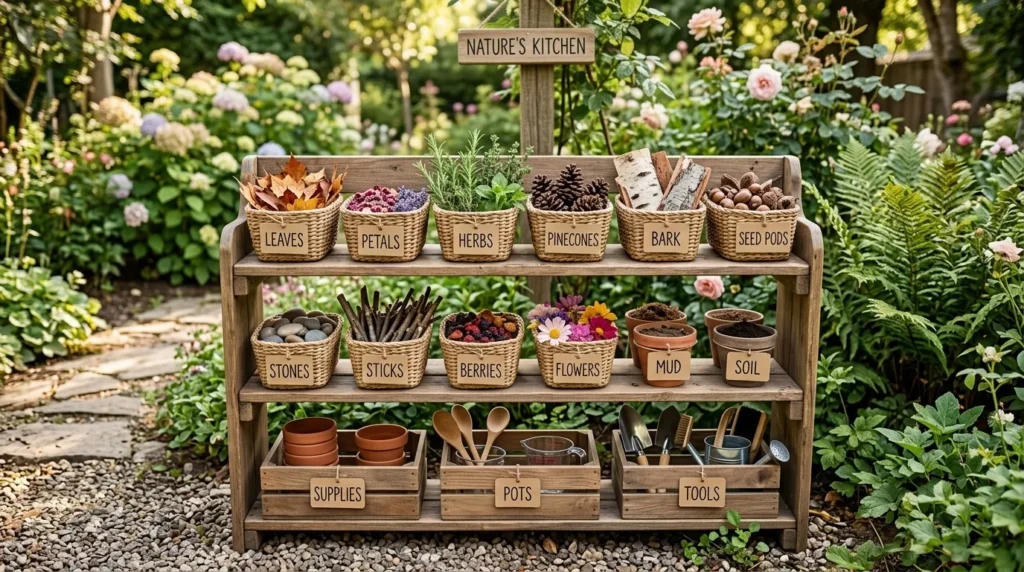
- Build or place a low shelf for leaves, petals, herbs, pinecones, seed pods, bark, and smooth stones.
- Use small crates, metal pails, shallow baskets, or divided trays so each natural material has its own place.
- Add word labels or picture labels to help children sort, read, clean up, and choose ingredients independently.
- Rotate the shelf by season with spring flowers, summer herbs, fall leaves, and winter pinecones.
- Check all natural items for insects, thorns, mold, sharp edges, or tiny choking hazards before play.
A garden ingredient shelf turns ordinary backyard finds into pretend pantry supplies. Children love choosing from leaves, petals, herbs, pinecones, bark, and smooth stones when they are making outdoor recipes. Sorting these materials into baskets or small pails gives them freedom without letting the whole yard become scattered. I’ve noticed that kids create more detailed play when they can see their options clearly. A neat shelf helps them compare colors, textures, smells, and sizes while still feeling like they are simply playing.
The shelf can be very simple and still look beautiful. Use stacked crates, a narrow plant stand, or two boards fixed between side supports. Add labels such as leaves, stones, flowers, and sticks, or use small drawings for younger children. Rotate the materials as the seasons change so the station feels fresh without buying new toys. Place heavier items on lower shelves for safety. This small storage idea adds order, nature learning, and visual charm while keeping cleanup much easier at the end of play.
4. Pebble Play Floor
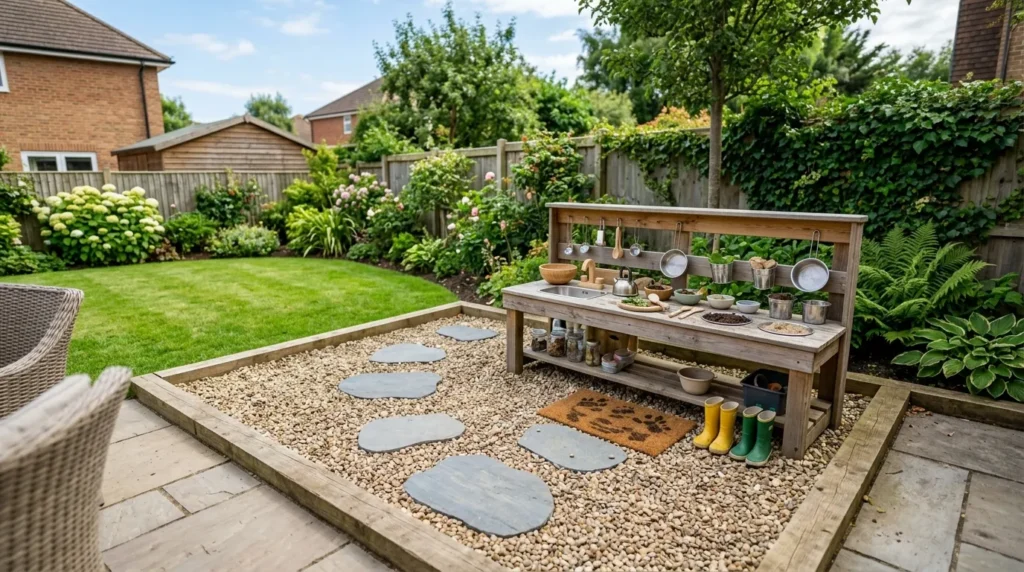
- Create a defined base with pea gravel, flat stones, pavers, or smooth river pebbles under the mud kitchen.
- Add landscape fabric below gravel to slow weeds and help the floor stay easier to maintain.
- Frame the area with timber, brick, stone edging, or flexible garden border to keep materials contained.
- Choose lighter stone in sunny climates because dark surfaces can become hot during summer afternoons.
- Add a washable mat at the exit so children can wipe shoes before walking onto the porch or indoors.
A defined floor can make the whole mud kitchen feel more finished. Grass often turns muddy under repeated water play, but gravel, stepping stones, or flat pavers create better drainage and a clear boundary. This tells children where messy play belongs and helps protect the rest of the yard. Use landscape fabric under pea gravel if weeds are a concern, then frame the zone with timber, brick, or flexible edging. A stable base makes the area safer when kids carry bowls, cups, and water.
The visual change is just as helpful as the practical upgrade. A pebble floor gives the station a tidy shape, especially when viewed from a deck, patio, or kitchen window. Light stones keep the mood bright and may stay cooler than dark surfaces in strong sun. Add a small outdoor mat near the path back to the house so mud does not travel indoors. With this simple base, the play area feels planned, easier to clean, and more connected to the rest of the backyard design.
5. Water Pump Corner
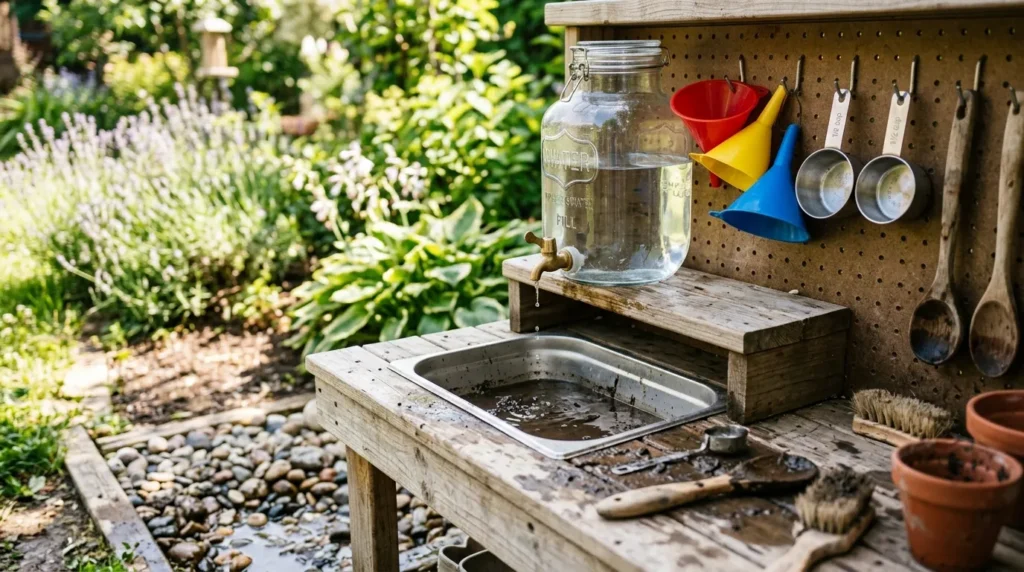
- Add a refillable water jug, camping dispenser, small spigot bucket, or hand-pump style feature for controlled water play.
- Place the water source above a bowl, tray, gravel area, or basin so drips land in a safe spot.
- Limit water by filling the container before play, which helps reduce waste during hot or dry weather.
- Add funnels, ladles, measuring cups, and pitchers so children can practice pouring, mixing, and measuring.
- Empty standing water after each session to prevent mosquitoes, slippery patches, and stale smells.
A water pump corner brings the mud kitchen to life. Water is what turns dry dirt into mud pies, soups, potions, and experiments, but a garden hose can quickly flood the yard. A refillable water jug, camping dispenser, spigot bucket, or simple hand-pump feature gives kids enough water to play without losing control of the mess. Place it above a sink bowl or gravel area so spills drain safely. This setup is especially useful for families who want outdoor sensory play without constant cleanup stress.
The corner works best when children have tools that make pouring interesting. Add funnels, measuring cups, small pitchers, ladles, and a tub for mixing. Fill the water container before play, then let kids decide how to use that amount. This teaches them to plan, pour carefully, and experiment with texture. After play, empty the container and let it dry upside down. The result is a water feature that feels exciting for kids, but still manageable for parents during regular backyard routines.
6. Mud Mixing Table
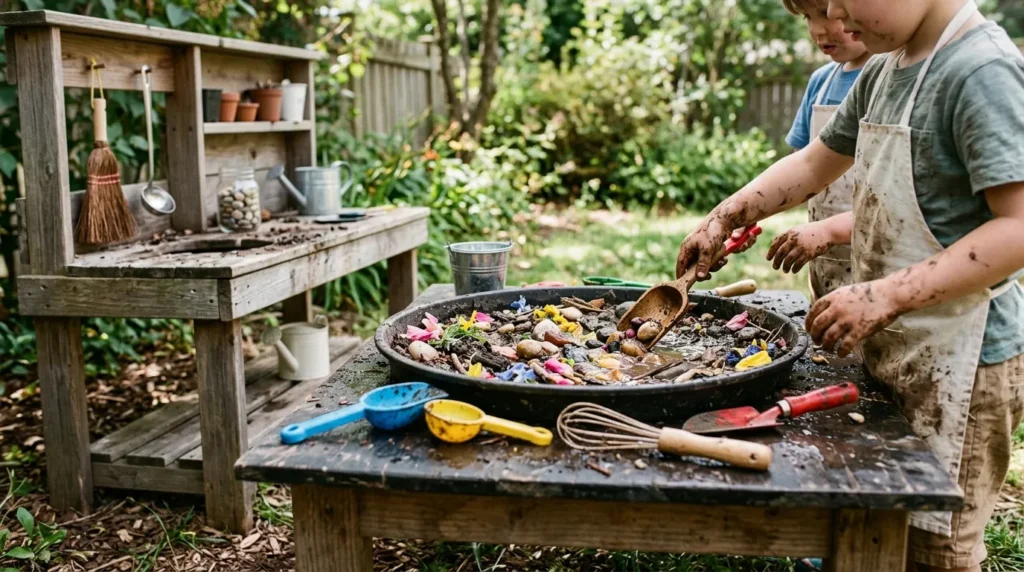
- Add a separate low table or tray just for mixing dirt, water, leaves, stones, and petals.
- Use an old coffee table, child-size table, crate, stump table, or shallow cement mixing tub.
- Keep this zone near the main counter so children can move from mixing to decorating and serving.
- Choose a washable surface or removable tray to make cleanup faster after heavy mud play.
- Add scoops, small shovels, spoons, and bowls so kids can dig, stir, pat, and transfer easily.
A separate mud mixing table keeps messy play from taking over every surface. Children need a spot where dirt, water, stones, and leaves can get truly messy without covering the pretend serving area. Use a low table, shallow tray, old coffee table, stump, or cement mixing tub as the base. This gives the play a natural flow, with mixing in one area and serving on another. In my experience, dividing the station into small zones helps children stay focused and reduces cleanup frustration later.
The table also adds depth to the setup because it gives kids more than one way to play. They can dig and stir at the lower table, then carry finished pies to the counter or market shelf. A removable tray is useful if your yard is small or if the mud kitchen sits on a patio. Choose darker surfaces if stains bother you, or use washable plastic bins for easy rinsing. This feature makes the whole backyard play station feel more active, practical, and ready for real mess.
7. Pallet Tool Wall
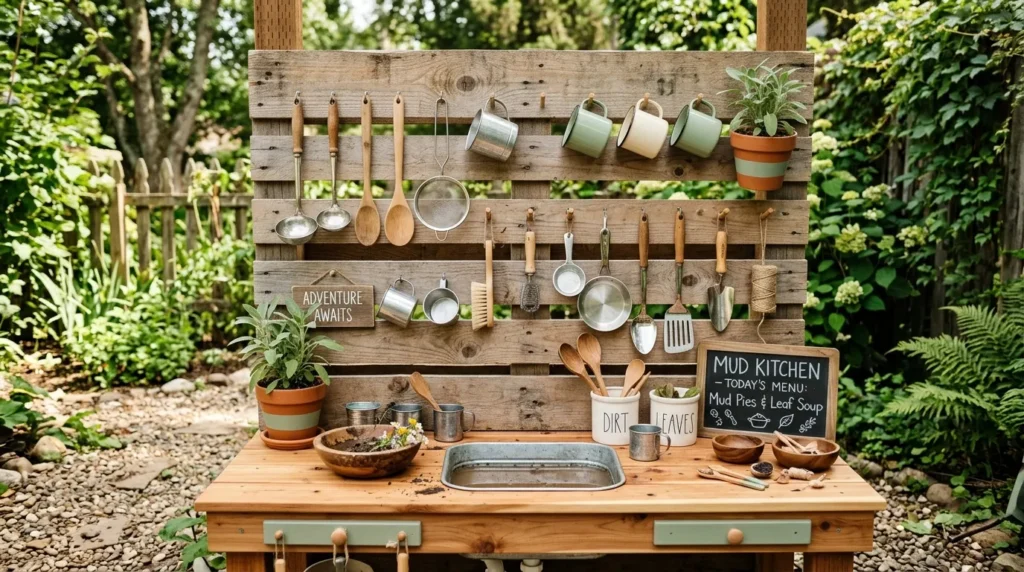
- Use a sanded pallet, pegboard, fence panel, or wide backboard to hang tools and organize the play station.
- Add hooks for ladles, wooden spoons, cups, strainers, brushes, small pans, and measuring spoons.
- Keep sharp, heavy, rusty, or breakable items out of reach, especially for younger children.
- Mount the tool wall firmly so it cannot wobble, lean, or tip during active play.
- Paint or stain the backdrop to match your backyard style and make the station look more finished.
A pallet tool wall instantly makes a mud kitchen look organized. Instead of piling spoons, cups, brushes, and strainers into a bucket, hang them where children can see every tool. Use a clean pallet, pegboard, fence panel, or wide wood board attached securely behind the station. Lightweight utensils from thrift stores or old kitchen drawers work perfectly. That’s why many designers recommend vertical storage for small outdoor play areas, because it saves floor space and keeps the main counter open for mixing and serving.
The tool wall also helps children clean up more independently. When every ladle, cup, and brush has a hook, putting things away becomes a simple matching task. Keep sharp tools, heavy pans, rusty pieces, and glass jars out of the play area. Paint the wall sage, cream, gray, or natural brown to match the garden. A neat row of hanging tools gives the station that charming workshop feeling many parents love saving on Pinterest, while still being useful for everyday play and quick resets.
8. Herb Planter Rail
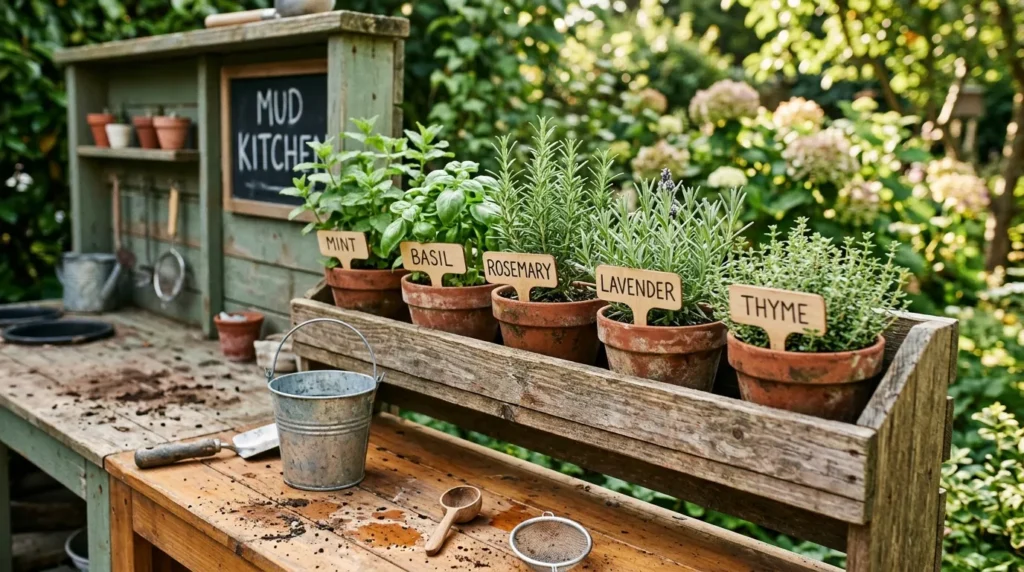
- Add a narrow planter rail with herbs and child-safe plants near the mud kitchen for scent, color, and pretend cooking.
- Use mint, basil, rosemary, lavender, thyme, pansies, or marigolds if they suit your climate and yard conditions.
- Keep plants close enough to smell and touch, but away from the heaviest splash zone.
- Add plant labels so children can learn names and understand which leaves they may pick.
- Use terracotta pots, metal buckets, or painted cans for a garden style that matches your backyard.
An herb planter rail adds life to the mud kitchen. Small pots of mint, basil, rosemary, lavender, thyme, pansies, or marigolds give kids real scents, textures, and colors to explore. Place the plants near the counter but not directly under the splash zone, because constant muddy water can damage them. I’ve seen this work well in many homes because herbs encourage children to slow down, smell, pick carefully, and notice living things while still staying fully inside their pretend play world.
The planter rail also makes the backyard look softer and more connected to the garden. Use terracotta pots for a classic look, galvanized buckets for farmhouse style, or painted cans for a playful homemade feel. Add plant markers so kids learn the names and know which leaves are okay to pick. This idea works beautifully in small spaces because it uses vertical or narrow shelf space. It adds color, scent, responsibility, and a more natural look without taking much room from active play.
9. Shade Sail Nook
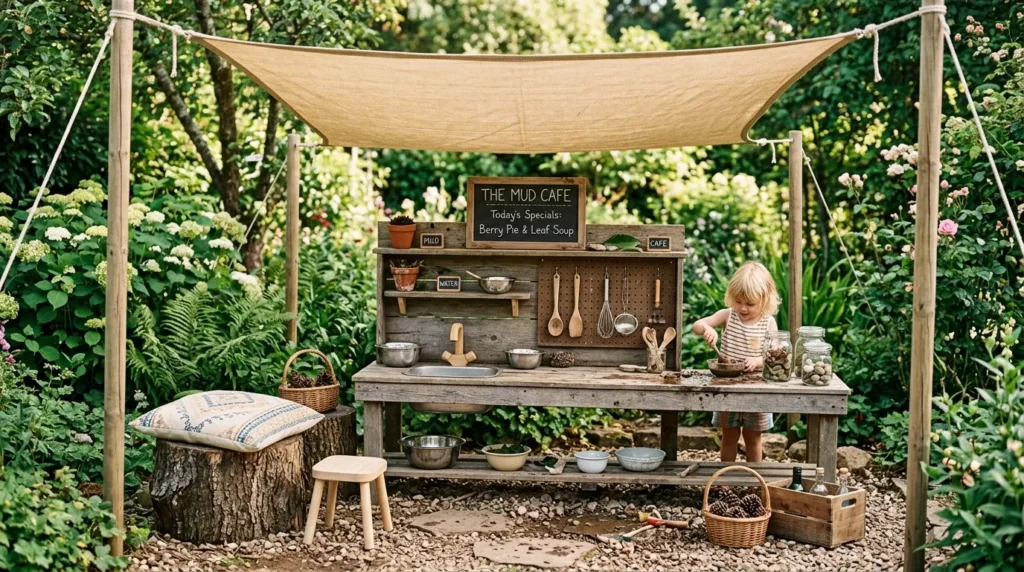
- Install a shade sail, canvas canopy, patio umbrella, or pergola panel to protect the play area from strong sun.
- Angle fabric slightly so rainwater runs off instead of collecting in the center after storms.
- Choose neutral canvas for a calm look, stripes for a playful feel, or soft green for a garden mood.
- Keep shade materials away from grills, fire pits, rough branches, and unsafe anchor points.
- Add a small stool, stump seat, or bench nearby so children can rest between muddy play rounds.
A shade sail nook can make the mud kitchen usable for much longer. Direct sun can heat wood surfaces, dry mud too quickly, and make kids tired before they settle into deep play. A canvas canopy, patio umbrella, pergola panel, or shade sail helps create a cooler, more comfortable area. This matters in many USA backyards, especially during warm afternoons. Secure the shade well, angle it for rain runoff, and keep it away from fire pits, grills, and rough tree branches.
The shade also changes the mood of the play area. Suddenly the station feels like a small outdoor room instead of a loose collection of toys. Neutral canvas looks calm and natural, while striped fabric feels cheerful and summery. Add a stump seat or small bench along the edge for breaks. If the mud kitchen sits near a patio, match the shade fabric to nearby cushions or planters. This detail improves comfort, style, and play time without changing the main structure of the build.
10. Seasonal Display Trays
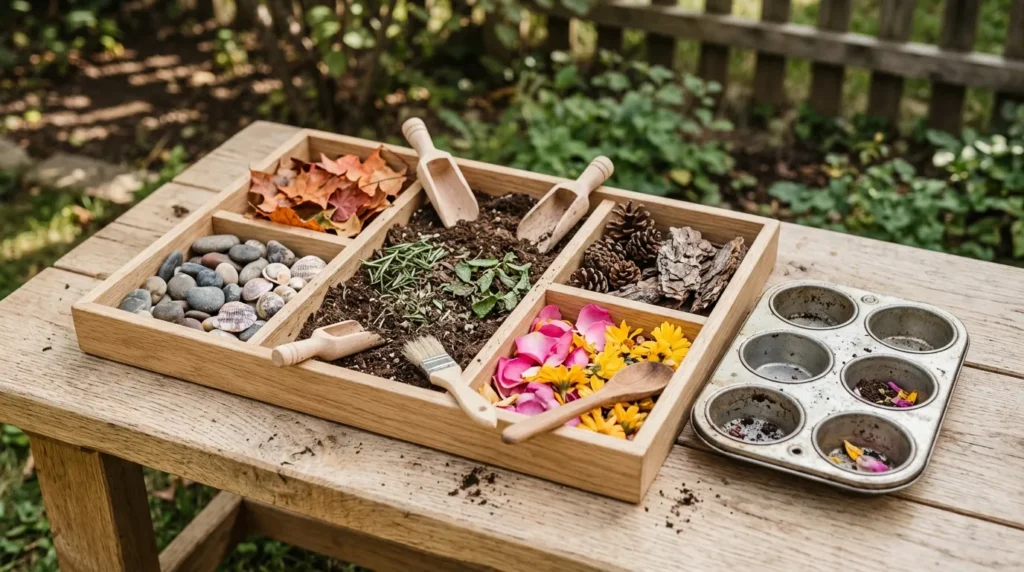
- Prepare small trays with spring petals, summer shells, fall leaves, winter pinecones, herbs, bark, and smooth stones.
- Use muffin tins, divided trays, shallow baskets, or metal pans to keep items sorted and easy to explore.
- Add scoops, brushes, tweezers, spoons, and cups so children can sort, pour, decorate, and count.
- Keep each tray small enough to clean quickly and rotate often without creating storage clutter.
- Store extra materials in labeled bins so you can reuse them through the year.
Seasonal display trays keep the mud kitchen feeling fresh all year. Children may love the same counter and sink, but small material changes can spark brand-new play. A spring tray might include petals, mint, and tiny pots. A summer tray could hold shells, smooth stones, and bright cups. Fall can bring acorns, leaves, and seed pods. Winter can include pinecones and evergreen clippings. These simple swaps help children notice seasons while giving them new textures, colors, and pretend ingredients.
The trays are easy to style and easy to clean. Use muffin tins, shallow baskets, divided containers, or metal pans so each material stays visible. Add scoops, brushes, tweezers, and spoons for more hands-on play. Keep each tray small, especially if you want cleanup to stay realistic after school or before dinner. Store extra seasonal pieces in labeled bins and bring them out again later. This keeps the play area exciting without buying new toys or rebuilding the mud kitchen every few months.
11. Outdoor Cleanup Cart
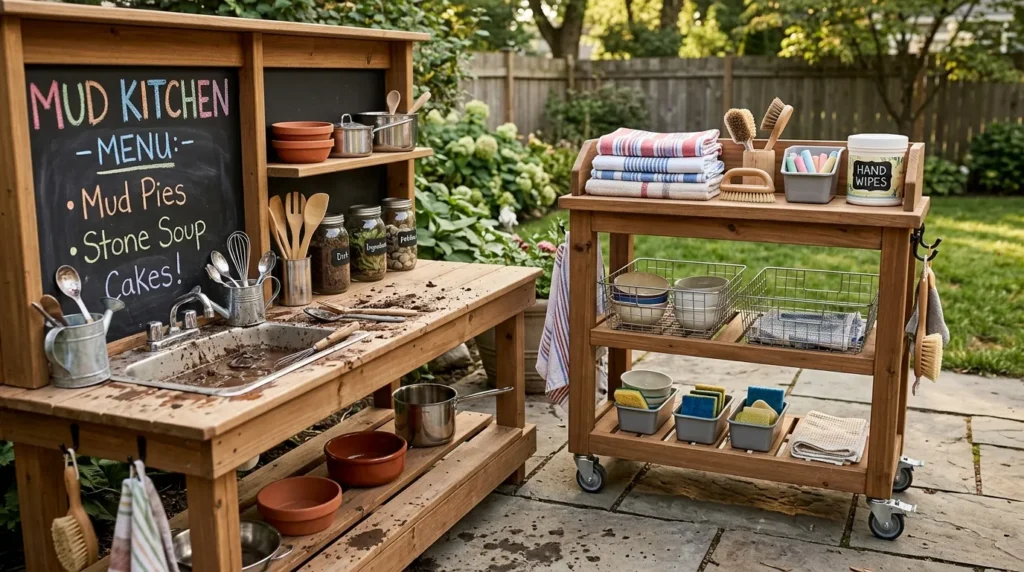
- Keep a small rolling cart or caddy near the mud kitchen with towels, wipes, brushes, chalk, and extra bowls.
- Use washable shelves, sturdy wheels, and small bins so supplies stay sorted while moving across the patio.
- Roll the cart into the garage, shed, or covered porch during storms, snow, or strong wind.
- Place cleanup supplies on the lower shelf so children can help reset the area after play.
- Choose plastic for heavy use, metal for a farmhouse look, or wood if the cart stays covered.
An outdoor cleanup cart makes messy play easier to manage. Keep towels, scrub brushes, hand wipes, extra chalk, spare bowls, and small tools on a rolling cart or portable caddy. Instead of searching for supplies after children are already muddy, everything is ready near the play zone. This simple setup protects floors, patios, and porch steps because cleanup starts before kids run inside. It also helps parents say yes to messy play more often because the reset routine feels quicker and less stressful.
The cart is especially helpful in changing weather. Roll it out during play, then move it into the garage, shed, or covered porch when storms or snow are expected. Organize the top shelf with clean bowls, the middle with tools, and the bottom with towels and brushes. Add small bins so items do not slide around. A rolling cart works well for renters too, because it adds storage without drilling into fences or walls. It keeps the whole backyard station flexible and tidy.
12. Twinkle Light Corner
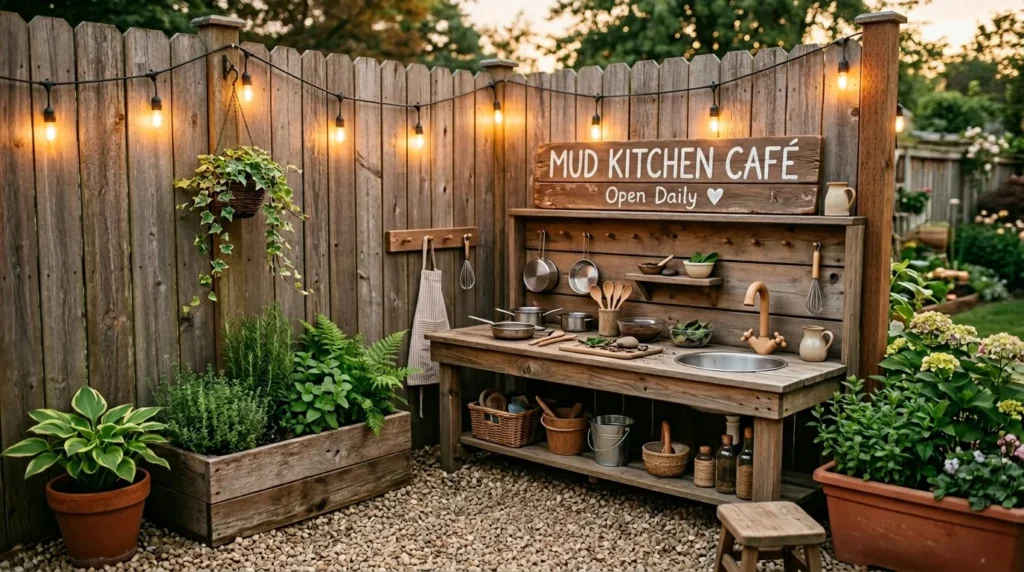
- Add outdoor-rated string lights near the mud kitchen for a magical evening look and cozy backyard atmosphere.
- Use only weather-safe lights and keep cords away from water, mud, children’s reach, and walking paths.
- Hang lights above the station, along a fence, under a canopy, or around a nearby pergola.
- Choose warm white bulbs for a soft garden feel or small fairy lights for a playful storybook mood.
- Use lights as decoration for family evenings, not as a replacement for safe daytime supervision.
A twinkle light corner makes the mud kitchen feel magical from the house. While most messy play happens during daylight, outdoor-rated string lights can make the area look cozy during family evenings, birthday parties, or backyard gatherings. Hang them along a fence, under a canopy, or around a nearby pergola. Always use weather-safe lights and keep cords away from water, mud, and children’s reach. This detail is more about atmosphere than active play, but it can make the whole backyard feel warmer.
The lights also help the mud kitchen blend into the rest of the outdoor space. Instead of looking like a daytime-only play corner, it becomes part of the garden mood after sunset. Warm white bulbs feel soft and classic, while tiny fairy lights create a storybook look. Pair them with planters, gravel, wood textures, and a little café sign for a charming finish. This final touch transforms the station visually and helps it feel like a thoughtful backyard feature, not just a play toy.