11 Stop Buying Toys — Try These Mud Kitchen Ideas Instead
A mud kitchen can do what many expensive toys cannot: keep kids busy, creative, and fully involved in real hands-on play. Instead of another toy that gets exciting for one week and then disappears into a bin, a backyard mud station gives children a place to mix, pour, scoop, sort, wash, pretend, and invent something new every time they step outside. For USA families, it is also a budget-friendly way to make outdoor play feel fresh without constantly buying more plastic toys.
The best part is that most of the materials are simple. Old bowls, thrifted spoons, scrap wood, buckets, crates, stones, leaves, water, and soil can become a full sensory play setup. Children do not need perfect equipment to enjoy this kind of play. They need a safe space, sturdy surfaces, and a few open-ended tools that let their imagination take over. That is why these Kitchen Ideas are so useful for parents who want less clutter and more meaningful backyard play.
This article shares 11 mud kitchen setups that kids can use again and again. Each idea focuses on real play value, easy materials, practical layout, and a visual style that looks good in a backyard. You can start with one small station or combine several ideas into a bigger outdoor play corner. The goal is simple: spend less on forgettable toys and create a backyard space your kids will actually remember.
1. Mud Pie Bakery
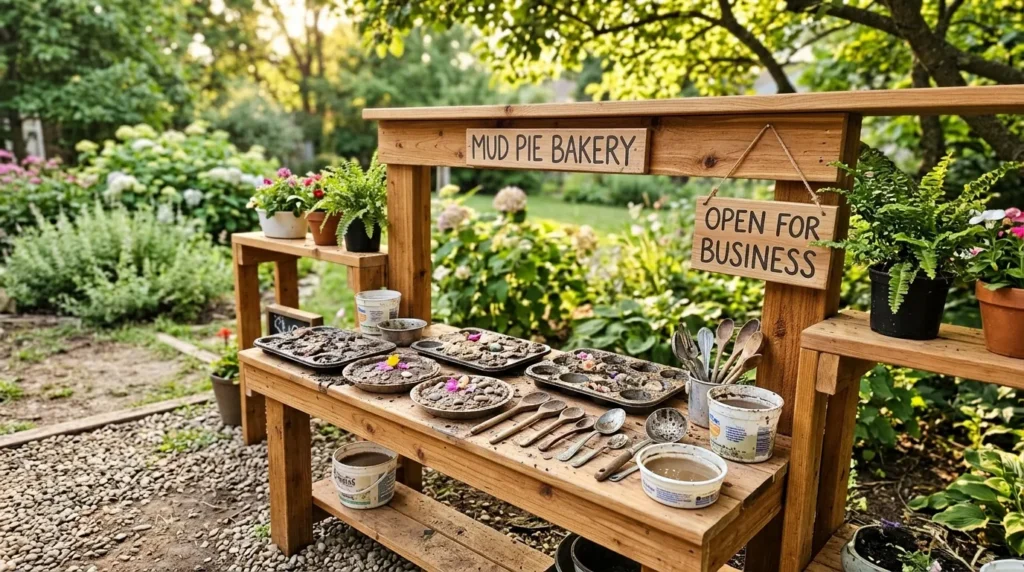
- Build one wide counter where kids can press, shape, decorate, and serve mud pies like a tiny outdoor bakery.
- Use cedar, pine, sealed plywood, old fence boards, or a reclaimed tabletop as the main surface.
- Add muffin tins, pie pans, wooden spoons, small bowls, and cupcake liners for pretend baking play.
- Keep the counter at child waist height so little hands can work comfortably without stretching.
- Place a bucket of soil nearby so kids can refill their “baking station” without digging up the lawn.
A mud pie bakery gives kids a reason to keep creating instead of asking for another toy. With one sturdy counter, a few pans, and a bowl of soil, children can spend ages pressing cakes, decorating pies, and serving pretend treats. Use sealed wood for the surface and keep it wide enough for bowls, trays, and small hands working side by side. In my experience, kids love setups that feel real, and a bakery theme gives them a simple story to follow without needing much adult direction.
The setup also makes the backyard feel more organized because messy play has a clear home. Add a small shelf below for muffin tins, a bucket for loose soil, and a tray for finished mud pies. Petals, leaves, pebbles, and herbs become sprinkles, frosting, and toppings. A warm wood stain looks natural, while soft white or sage paint gives the station a sweet cottage feel. This idea turns basic dirt play into a repeat activity that feels fresh every time children invent a new recipe.
2. Water Wash Sink
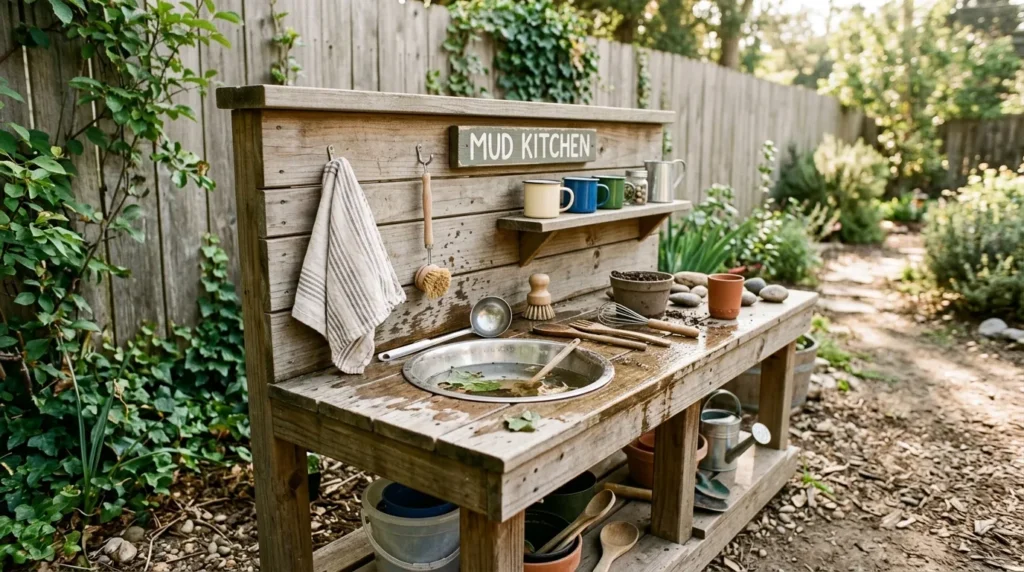
- Add a removable bowl sink so children can rinse stones, leaves, spoons, and pretend dishes.
- Use stainless steel, enamel, or strong plastic bowls with smooth rims and easy-lift edges.
- Cut the bowl into the counter for a built-in look, or place it on top for a no-cut version.
- Keep a towel hook, scrub brush, and small cup nearby to make the sink more useful.
- Empty standing water after play to prevent mosquitoes, slippery spots, and stale smells.
A water wash sink turns a simple mud counter into something kids take seriously. They can rinse rocks, wash leaves, clean spoons, and pretend they are running a real outdoor kitchen. You do not need plumbing for this to work. A removable bowl is cheaper, safer, and much easier to clean than a fixed sink. Choose a bowl that fits your child’s reach and has no sharp rim. That small detail matters because children move quickly when water, mud, and pretend cooking all happen together.
The transformation is immediate because water adds sound, movement, and purpose to the play. Kids can wash, pour, refill, and compare clean items with muddy ones. Place the bowl over gravel, a tray, or a washable mat so small spills do not turn into slippery patches. Add a scrub brush and towel nearby so cleanup becomes part of the game. When play ends, lift the bowl out, dump the water away from walkways, rinse it, and let it dry upside down for the next outdoor session.
3. Nature Pantry Shelf
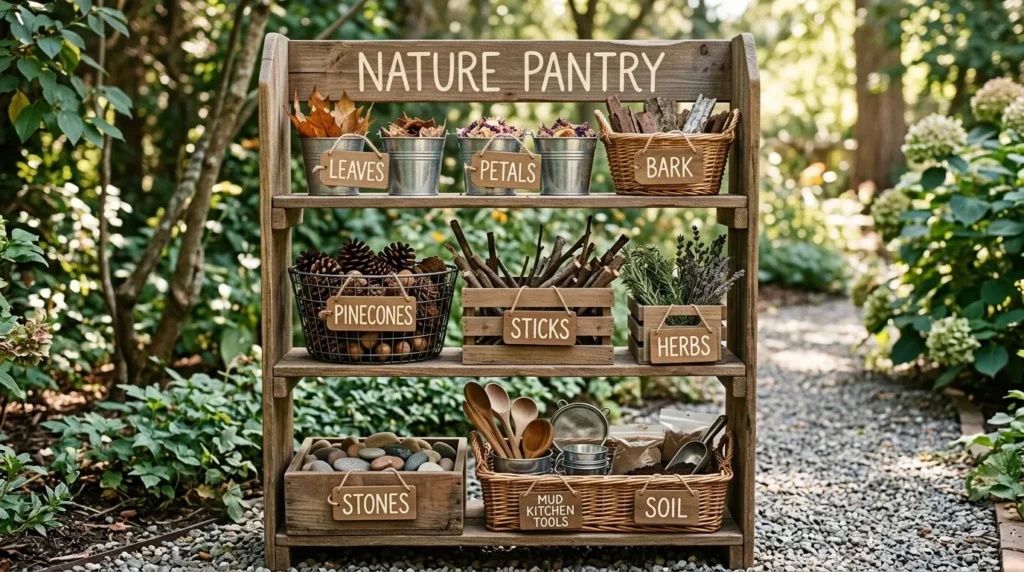
- Use crates, baskets, trays, or metal pails to hold leaves, petals, pinecones, bark, sticks, and stones.
- Sort each natural material into its own container so kids can choose pretend ingredients easily.
- Add simple labels with words or pictures to support early reading and cleanup routines.
- Rotate the pantry by season with spring flowers, summer herbs, fall leaves, and winter pinecones.
- Check items for insects, thorns, mold, sharp pieces, or choking hazards before play.
A nature pantry shelf makes the whole mud kitchen feel richer without buying pretend food. Instead of plastic vegetables, kids can use leaves, petals, bark, pinecones, herbs, sticks, and smooth stones as their ingredients. Sort them into small baskets or metal pails so children can see everything clearly. I’ve noticed that kids play with more imagination when materials are organized but still open-ended. They start naming recipes, comparing textures, counting pieces, and choosing colors while thinking they are only playing outside.
This shelf also keeps the yard from becoming messy too quickly. When every natural item has a spot, cleanup becomes easier for kids and parents. Use low shelves for heavier baskets and higher shelves for lighter items like petals or leaves. Add picture labels for younger children who cannot read yet. Change the contents through the year so the play area feels new without shopping for more toys. A nature pantry is simple, pretty, and useful, especially for families who want outdoor play to feel connected to the yard.
4. Rock Washing Tray
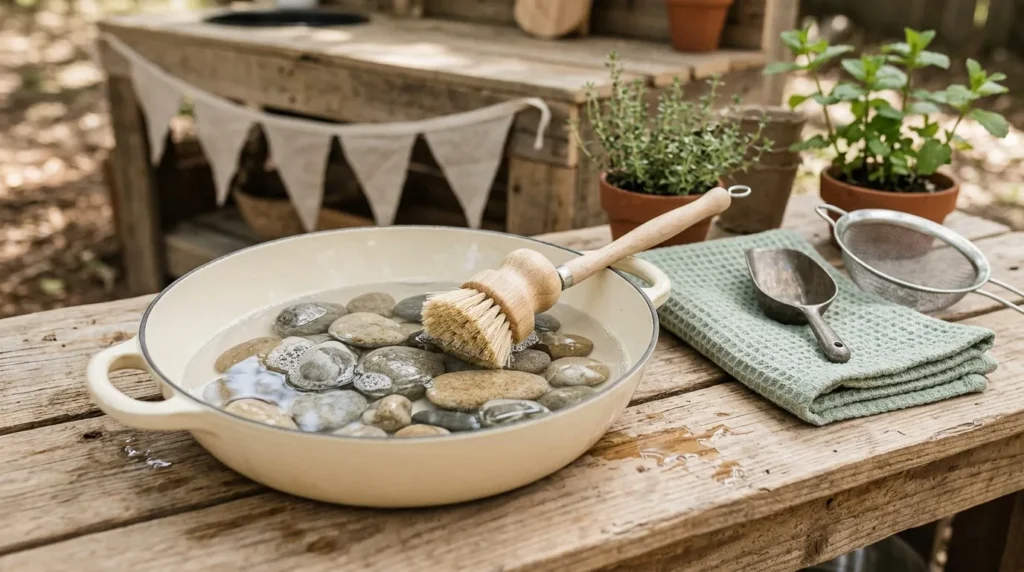
- Set up a shallow tray where kids can scrub, rinse, sort, and dry smooth stones.
- Use river stones, large pebbles, or garden rocks that are safe for your child’s age.
- Add a small brush, towel, scoop, colander, and cup for realistic washing play.
- Keep tiny stones away from toddlers and avoid rocks with sharp edges or loose flakes.
- Place the tray near the sink so water stays in one controlled part of the station.
A rock washing tray gives children a calm activity they can repeat again and again. Many kids enjoy scrubbing, rinsing, sorting, and moving stones because it feels like real work but still looks like play. Use a shallow tray, boot tray, enamel pan, or plastic tub, then add smooth stones and a small brush. That’s why many designers recommend simple sensory stations in outdoor play areas. They encourage focus, hand strength, sorting, and careful movement without needing loud toys or complicated instructions.
The tray also adds a beautiful natural texture to the mud kitchen. Choose gray, cream, tan, or river-colored stones for a soft backyard look. Kids can wash stones, sort them by size, dry them with a towel, and later use them as pretend ingredients or pie decorations. Keep the tray close to the sink so spills stay controlled. This idea works well for children who enjoy quieter play, and it gives parents an easy activity to reset without needing batteries, parts, or special supplies.
5. Stick Soup Station
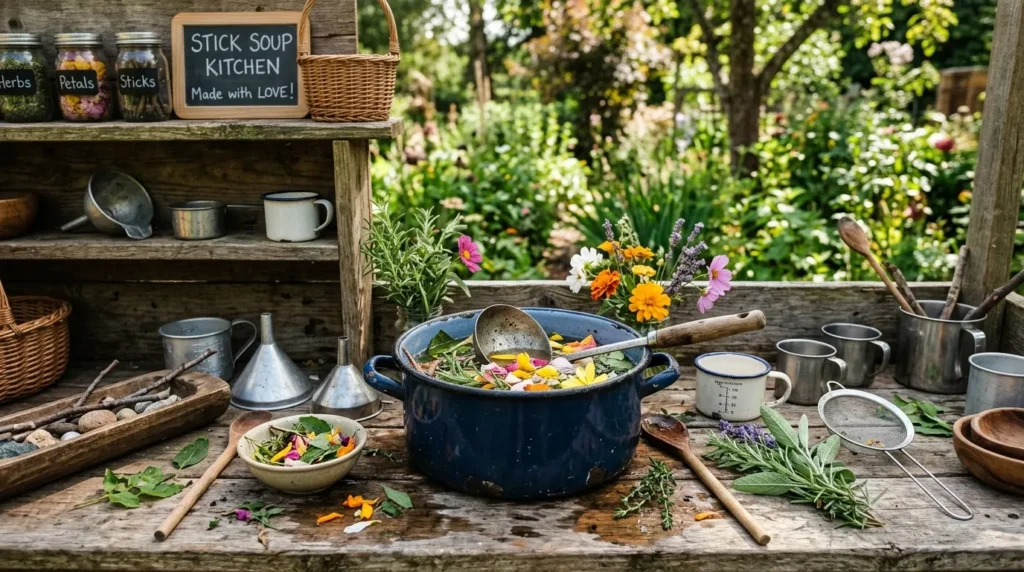
- Create a small soup-making zone with water, sticks, leaves, petals, herbs, and safe outdoor clippings.
- Use a large bowl, enamel pot, plastic tub, or shallow basin that can be rinsed easily.
- Add ladles, measuring cups, funnels, and strainers to make mixing and pouring more engaging.
- Keep this station near the counter so kids can prepare, serve, and return for more ingredients.
- Teach children which plants are safe to touch and which garden areas are off-limits.
A stick soup station gives kids the joy of making something from almost nothing. A bowl of water, a few sticks, leaves, petals, and herbs can become forest soup, garden stew, or magic potion in minutes. Use a washable basin, enamel pot, or plastic tub as the main bowl. Add ladles and measuring cups so children can stir, scoop, pour, and serve. In my experience, pretend soup play often leads to longer conversations because kids explain every ingredient as if they are real chefs.
This station works especially well beside a mud pie counter because it creates another type of recipe play. Children can move between baking, washing, and soup-making without needing new toys. Keep a small basket of safe sticks and leaves nearby so they are not pulling from delicate garden beds. Add herbs like mint or rosemary for scent if they are safe and available. A stick soup station looks simple, but it supports sensory play, language, fine motor skills, and imaginative storytelling in a way plastic toy sets rarely do.
6. Crate Market Stand
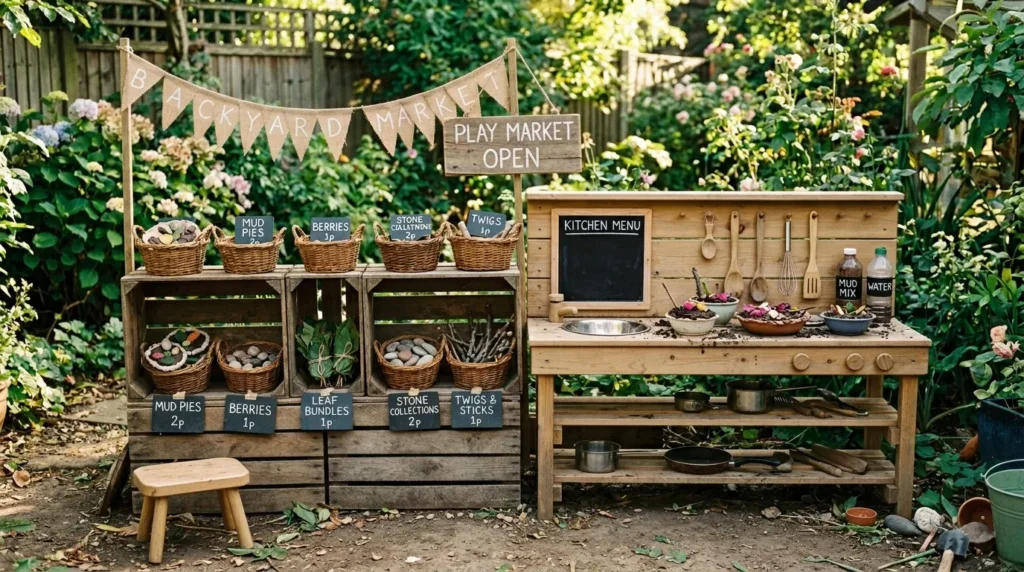
- Stack sturdy crates into a low display stand where kids can sell mud pies, leaf bundles, and stone collections.
- Use wooden crates for a rustic look or washable plastic crates for easier cleaning.
- Add chalk tags, pretend prices, small baskets, and trays for a market-style setup.
- Secure crates if they are stacked vertically so they cannot tip during active play.
- Place the stand beside the counter so children can move naturally from making to displaying.
A crate market stand turns finished mud creations into part of the play story. After making pies, soups, stone collections, or flower cups, children can arrange everything like a tiny backyard shop. Stack wooden crates, use a low shelf, or repurpose a small plant stand as the display area. This idea works because it gives kids a next step after making something. They can name items, set pretend prices, take orders, and serve parents, siblings, cousins, or stuffed animals.
The market stand also adds structure and charm to the backyard setup. Use chalk tags, small baskets, and trays to make the display look intentional. Keep the shelf low so children can arrange items independently without climbing. If crates are stacked, secure them so they do not tip during excited play. A market area supports counting, language, sorting, and social play while still feeling relaxed. It also gives the mud kitchen a photo-friendly corner that looks cute without needing store-bought toy food.
7. Tool Hook Wall
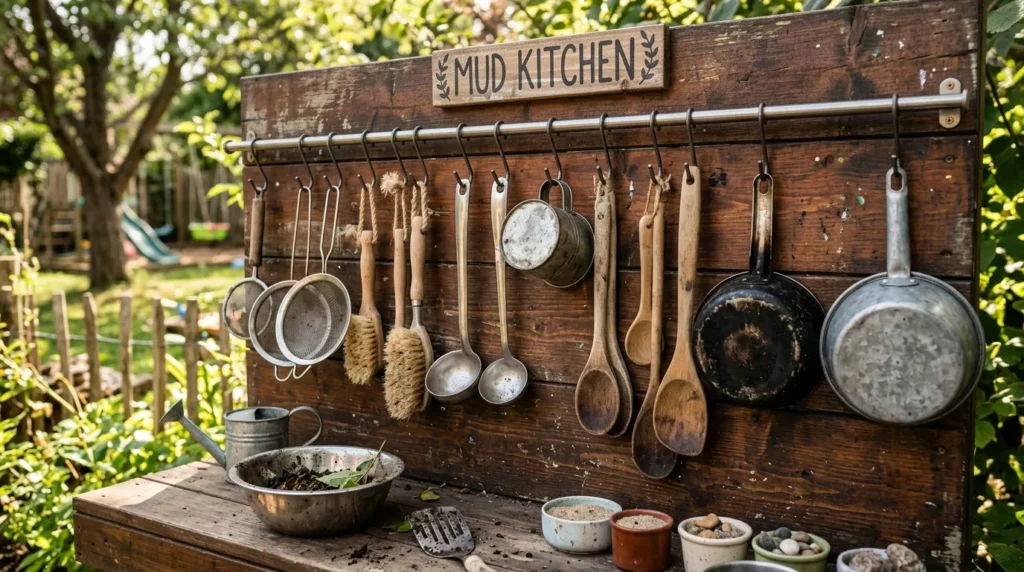
- Add a pegboard, pallet board, towel bar, or wooden rail to hang spoons, cups, brushes, and strainers.
- Use S hooks for lightweight tools and keep sharp, heavy, rusty, or breakable items out of reach.
- Mount the rail low enough for children to reach without climbing or pulling on the board.
- Group similar tools together so kids can clean up by matching each item to its place.
- Paint or stain the backboard to match the yard and make the setup look more finished.
A tool hook wall keeps the mud kitchen from turning into a clutter pile. Instead of dumping every spoon, cup, brush, and strainer into one bucket, hang them where children can see each option. Use a pegboard, towel bar, wooden rail, or sanded pallet board fixed securely behind the counter. Lightweight thrifted utensils work beautifully for this setup. I’ve seen this work well in many homes because children love tools that look real, and parents love knowing exactly where everything belongs after play.
The wall also makes cleanup easier for young kids. When every tool has a hook, putting items away feels like matching instead of cleaning. Group ladles together, cups together, and brushes together so the display looks tidy. Avoid sharp, rusty, heavy, or breakable pieces, especially if younger siblings use the station. A stained wood backboard feels rustic, while painted pegboard looks bright and playful. This simple storage upgrade saves counter space, improves the look of the area, and helps children take more responsibility for their outdoor play tools.
8. Shade Play Nook
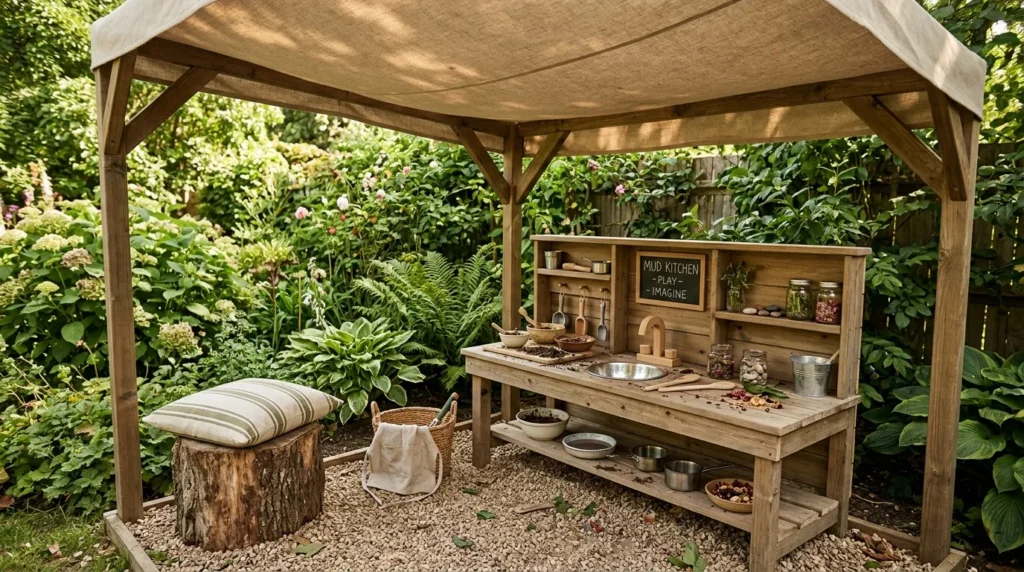
- Add a shade sail, patio umbrella, canvas canopy, or pergola panel above the mud kitchen.
- Angle fabric slightly so rainwater runs off instead of pooling in the center.
- Choose neutral canvas for a calm garden style or stripes for a playful summer feel.
- Keep shade materials away from grills, fire pits, rough branches, and unsafe support points.
- Add a stump seat, small bench, or outdoor cushion nearby so kids can rest between play rounds.
A shade play nook can make the mud kitchen usable for much longer. Direct sun can heat wood surfaces, dry mud too quickly, and make children tired before they settle into deep play. A shade sail, patio umbrella, canvas cloth, or small pergola panel makes the space more comfortable during warm afternoons. This is especially helpful in sunny parts of the USA where backyard play often happens after lunch or on weekends. Secure the shade properly and keep fabric away from heat sources and sharp branches.
The mood changes as soon as shade goes up. The station starts to feel like a small outdoor room instead of a toy area sitting in the yard. Neutral canvas creates a calm natural look, while striped fabric adds a cheerful summer style. Add a stump seat, low bench, or washable cushion near the edge so kids can rest between recipes. A shaded play nook also photographs beautifully, especially with wood, gravel, baskets, and greenery underneath. It improves comfort and makes the whole backyard feel more inviting.
9. Seasonal Play Trays
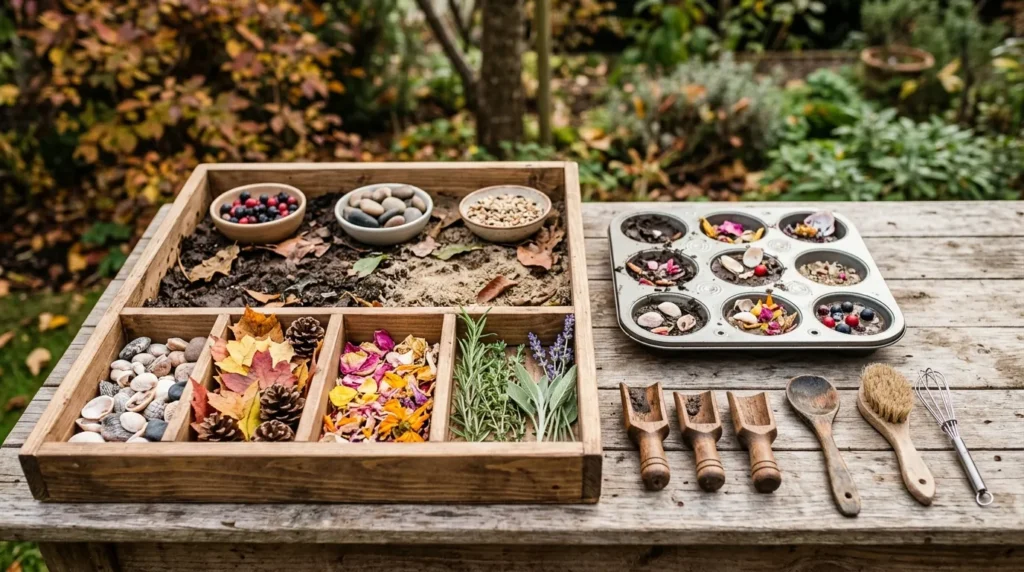
- Prepare small trays with spring petals, summer shells, fall leaves, winter pinecones, herbs, and smooth stones.
- Use muffin tins, divided containers, shallow baskets, or metal pans so materials stay sorted.
- Add scoops, brushes, cups, tweezers, and spoons to support sorting, pouring, and decorating.
- Keep each tray small enough to reset quickly after school, before dinner, or before bad weather.
- Store extra seasonal materials in labeled bins so you can reuse them throughout the year.
Seasonal play trays keep the mud kitchen interesting without buying more toys. A spring tray might include flower petals, mint, and tiny pots. A summer tray could hold shells, smooth stones, and bright cups. Fall can bring leaves, acorns, bark, and seed pods. Winter can include pinecones, evergreen clippings, and wooden scoops. These small changes give children fresh inspiration while keeping the main setup the same. That is the real value of open-ended outdoor play: it can change without needing a shopping trip.
The trays are easy to prepare and easy to clean when they stay small. Use muffin tins, divided trays, shallow baskets, or metal pans so children can see everything clearly. Add scoops, tweezers, cups, brushes, and spoons for more hands-on play. Store extra materials in labeled bins and rotate them when the station starts feeling familiar. This keeps kids curious through the year and gives parents simple Pinterest-friendly moments without building a new project every month or adding more plastic toys to the house.
10. Pretend Menu Board
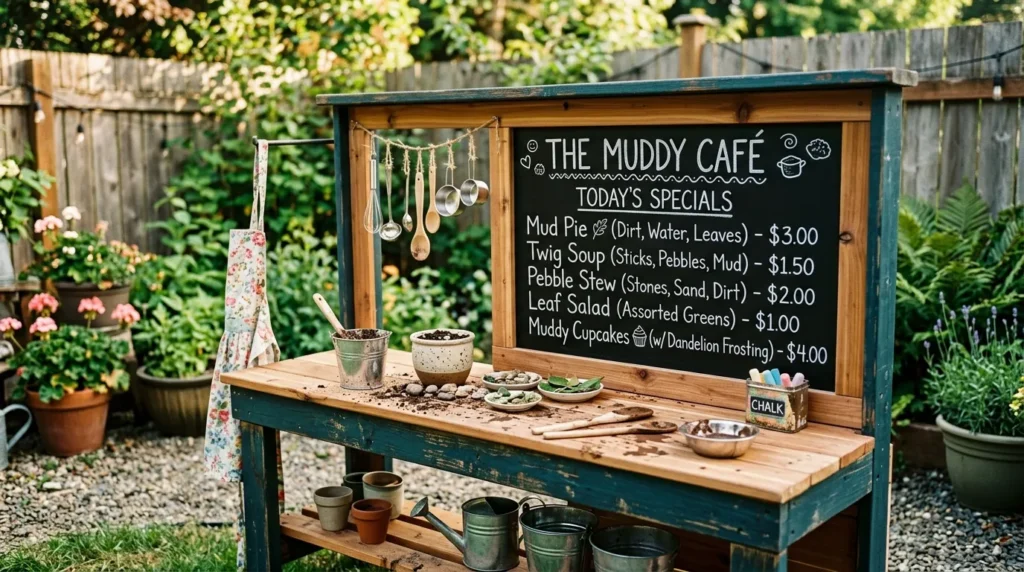
- Add a chalkboard or painted board where kids can write menus, recipes, prices, and café names.
- Use exterior chalkboard paint, a sealed plywood panel, or an old cabinet door for the surface.
- Keep chalk in a covered tin or small waterproof container so it does not get ruined by rain.
- Draw simple icons for younger kids who are not writing yet but still want to join in.
- Mount the board above the counter or beside the market stand for a strong visual feature.
A pretend menu board gives the mud kitchen a story before play begins. Kids can write café names, mud pie flavors, soup specials, pretend prices, or silly recipes. Use an old cabinet door, sealed plywood panel, or exterior chalkboard paint on a smooth board. Keep chalk in a small covered container so it stays dry between sessions. In my experience, a menu board works well because it lets the play change every day without changing the main setup or buying extra accessories.
The board also adds a strong Pinterest-style visual detail. A dark chalkboard against warm wood creates contrast, while a painted frame makes the station look finished. For younger children, draw simple icons like leaves, bowls, stones, flowers, and water drops so they can copy or point. Older kids can use the board for writing, spelling, counting, and pretend restaurant play. Place it where children can reach it safely. This small feature adds language, creativity, and personality to the mud kitchen without taking up much space.
11. Quick Cleanup Basket
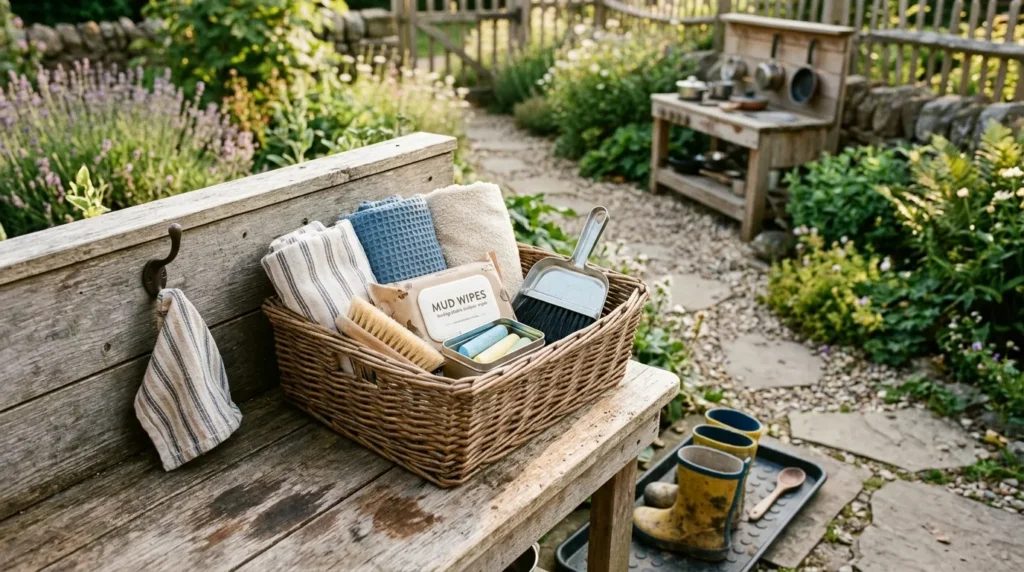
- Keep one basket or caddy near the mud kitchen with towels, wipes, a scrub brush, and extra chalk.
- Add a small dustpan, shoe brush, and boot tray if the station sits near a patio door.
- Place the basket near the path back to the house so cleanup happens before kids run inside.
- Choose plastic for heavy use, galvanized metal for farmhouse style, or woven baskets for covered areas.
- Teach a simple routine: empty bowls, hang tools, wipe hands, brush shoes, and leave muddy items outside.
A quick cleanup basket is the reason parents keep saying yes to mud play. Place a plastic caddy, galvanized tub, or weatherproof basket near the station with towels, wipes, a scrub brush, extra chalk, and a small dustpan. Keep it close to the path back to the house, not hidden behind the counter. When supplies are visible, children are more likely to wipe hands, brush shoes, rinse tools, and leave muddy items outside before stepping onto the porch or into the kitchen.
The cleanup area should feel like part of the play, not a punishment at the end. Add a boot tray for muddy shoes, a low hook for damp towels, and a small bin for dirty utensils waiting to be washed. Keep the routine short and repeatable: empty bowls, hang tools, wipe hands, brush shoes. When cleanup takes five minutes instead of twenty, the mud kitchen gets used more often. This final detail makes the whole setup easier to maintain and much more practical for real family life.