13 Build a Mud Kitchen in One Day With These Ideas
A backyard mud kitchen does not need to take weeks, require advanced carpentry, or cost more than your outdoor furniture. With the right plan, you can create a playful, practical, good-looking setup in one day using simple supplies like crates, pallets, old bowls, garden buckets, leftover wood, thrifted utensils, and a little imagination. Kids are usually not looking for perfection. They want a place to scoop, pour, stir, rinse, decorate, pretend, and make glorious outdoor messes.
This guide is designed for real USA backyards, patios, side yards, rental spaces, and garden corners. Each idea focuses on quick setup, useful materials, child-friendly function, and a finished look that still feels Pinterest-worthy. You can choose one idea or combine several to make a backyard play space that feels custom without becoming overwhelming.
1. Pallet Workbench
- Uses reclaimed wood for a fast backyard setup
- Works with metal bowls, hooks, buckets, and old pans
- Creates a rustic counter without expensive materials
- Best placed against a fence, shed, or garden wall
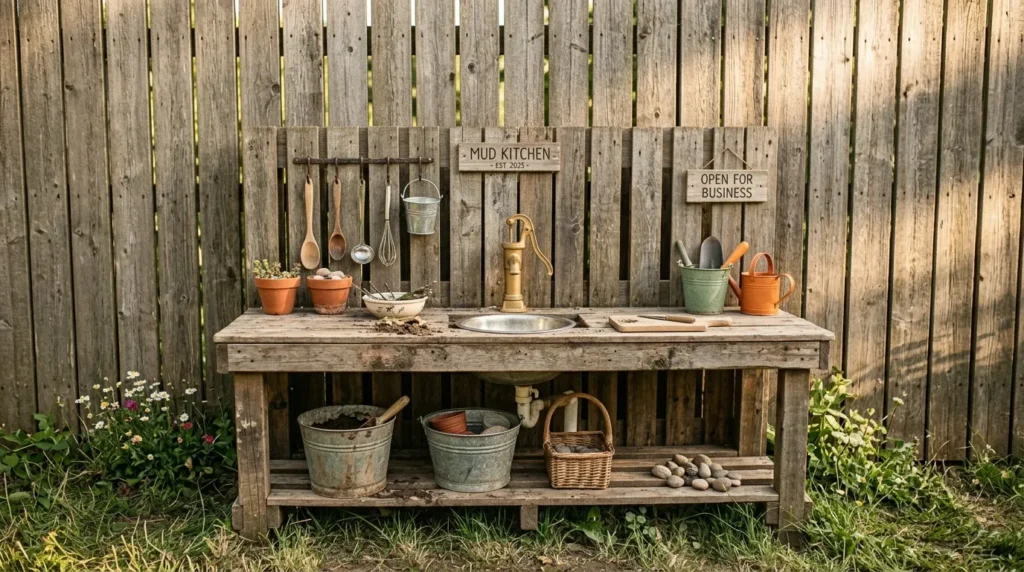
A pallet workbench is one of the fastest ways to create a real-feeling outdoor play kitchen. Choose a sturdy pallet or reclaimed boards, sand every rough edge, and add a flat board across the top for a smoother counter. Place a removable metal bowl on the surface as a pretend sink, then attach hooks for spoons and cups. In my experience, this setup works best when backed against a fence because the vertical surface makes it feel more stable, finished, and easy for kids to use.
The finished look feels charming because the rough wood blends naturally with grass, mulch, raised beds, and casual backyard landscaping. Add a crate underneath for buckets, a small basket for pinecones, and an old muffin tin for pretend baking. Seal the wood with an outdoor-safe finish if it will stay outside through rain or summer sun. This setup gives children a clear space for mixing mud pies, rinsing stones, and serving pretend meals, while still looking like a sweet handmade feature in the yard.
2. Crate Kitchen
- Builds counter space and storage at the same time
- Uses wooden crates, produce boxes, or sturdy bins
- Easy to customize for patios and small yards
- Great for bowls, jars, baskets, and nature supplies
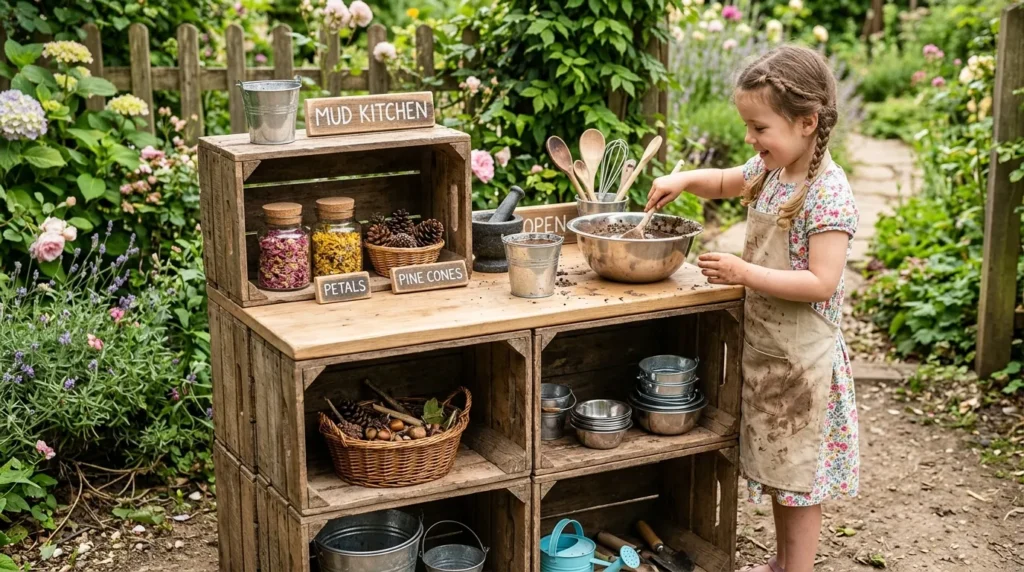
A crate kitchen is perfect when you want a one-day project with very little cutting or building. Stack sturdy crates horizontally and vertically, then secure them together so they stay stable during play. Add a smooth board across the top if you want a wider work surface. The open crate spaces naturally become shelves for bowls, cups, jars, pinecones, stones, petals, and washable utensils. This works beautifully because storage is part of the design from the beginning, which keeps the play area from turning chaotic.
The transformation can look surprisingly polished with simple styling. Leave the crates natural for a rustic garden feel, stain them to match a fence, or paint them in soft outdoor colors like sage, cream, or dusty blue. Keep heavier items on the bottom and lighter baskets higher for safety. Add a removable bowl sink and a small chalk label to make the setup feel intentional. The result is compact, affordable, and flexible enough for families who want a play kitchen that can grow or change later.
3. Bucket Sink
- Adds realistic washing and mixing play
- Uses buckets, basins, enamel bowls, or metal mixing bowls
- Keeps water controlled and cleanup simple
- Ideal for patios, decks, and smaller outdoor spaces
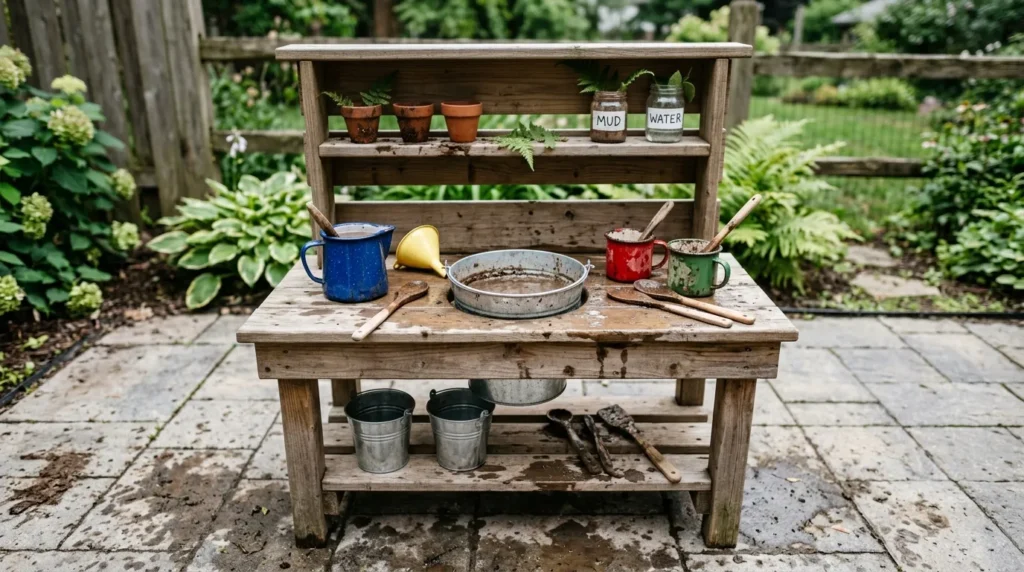
A bucket sink gives children the joy of a real kitchen feature without plumbing or complicated installation. Use a plastic bucket, stainless-steel mixing bowl, enamel basin, or old dish tub as the sink. It can sit on top of a counter or fit into a simple crate opening for a built-in look. The most important detail is that it stays removable. After play, you can lift it out, dump muddy water safely, rinse it, and store it upside down so it dries properly.
This idea is especially useful when you need to control mess on a patio, deck, or compact backyard. Add a watering can, small pitcher, and funnel so kids can pour and refill without flooding the space. I’ve noticed children love this feature because it gives them a clear role, almost like washing dishes or making soup. The result is practical, engaging, and easy to reset. It makes even a very simple counter feel complete, purposeful, and ready for open-ended outdoor play.
4. Fence Counter

- Saves floor space by using a vertical backdrop
- Works with narrow shelves, hooks, cups, and signs
- Keeps tools visible and easy to return
- Great for side yards, patios, and fence corners
A fence counter is smart because it uses space you already have instead of adding a bulky freestanding structure. Attach a narrow board or outdoor shelf at child-friendly height, then add hooks above it for spoons, cups, small pans, and lightweight buckets. This layout works well along privacy fences, shed walls, or narrow side yards where every inch matters. Make sure the counter is securely attached, sanded smooth, and installed with outdoor-safe hardware before children begin using it during active play.
The finished design looks tidy because the fence becomes both storage wall and visual backdrop. Add a chalkboard sign, a small hanging colander, enamel mugs, and one crate underneath for muddy supplies. This keeps the main yard open for running, seating, or gardening while still giving kids a dedicated play area. The result is compact, organized, and cute enough for photos. It also teaches children to return tools to the hooks, which makes cleanup feel more natural and less like a separate chore.
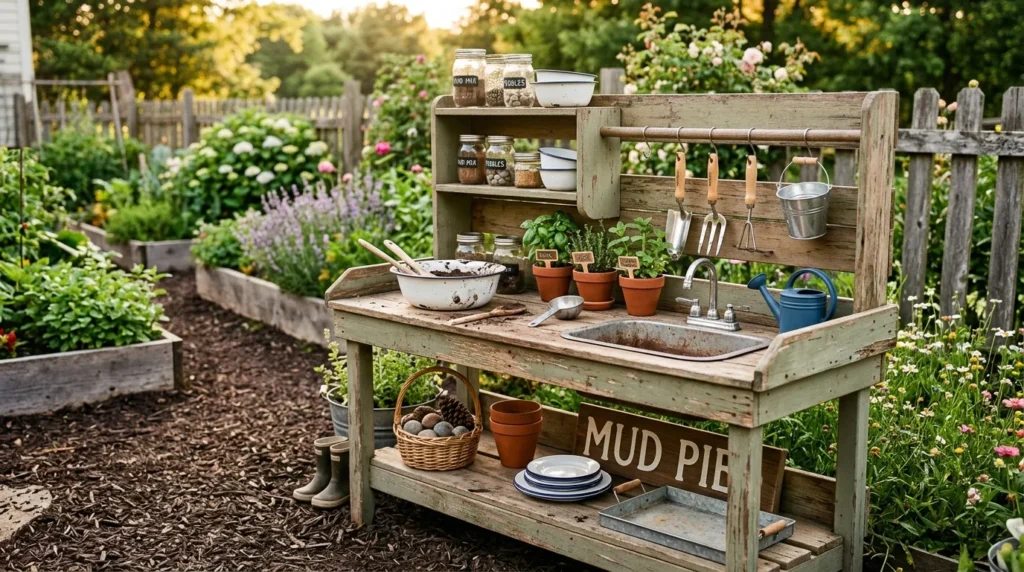
5. Potting Bench
- Repurposes existing garden furniture quickly
- Offers counter space, shelves, and lower storage
- Works with terracotta pots, baskets, and metal bowls
- Blends naturally with gardens and backyard décor
A potting bench already has the shape of a mud kitchen, which makes it one of the easiest one-day transformations. Most benches include a work surface, back shelf, and lower storage, so you mainly need to make the piece child-safe. Sand splinters, tighten loose screws, remove sharp hooks, and check that the bench stands firmly. If it is too tall, choose a lower version or add a sturdy child-safe platform. The goal is a comfortable workspace children can reach without climbing or leaning dangerously.
The finished look feels natural because a potting bench already belongs outdoors. Add terracotta pots, small metal bowls, wooden spoons, old pans, and baskets filled with leaves or pinecones. That’s why many outdoor play designers recommend reusing garden furniture before buying new play equipment. It saves money and usually looks better in real backyards. The result is sturdy, charming, and useful for everyday play, especially if your family already has raised beds, planters, mulch paths, or a garden corner nearby.
6. Rolling Cart

- Moves easily between shade, patio, grass, and storage
- Works well for renters and flexible backyards
- Uses bins, baskets, pitchers, and removable bowls
- Easy to clean up after messy play
A rolling cart is perfect when you want a mud kitchen that can move with your family’s outdoor routine. Choose a sturdy cart with locking wheels and organize each shelf by function. The top shelf can hold bowls and scoops, the middle shelf can store cups and utensils, and the bottom shelf can hold muddy bins or water tools. This setup works especially well for renters, small patios, and families who need to roll supplies into shade during hot afternoons or indoors before storms.
The best part is that cleanup becomes built into the design. When playtime ends, muddy bowls can go into one bin, dry tools into another, and the whole cart can be parked neatly out of the way. Add hooks on the side for ladles or measuring cups, and keep a towel nearby for quick rinses. The finished cart feels organized, flexible, and surprisingly complete. It gives children the experience of a full pretend kitchen while respecting limited space, changing weather, and busy family schedules.
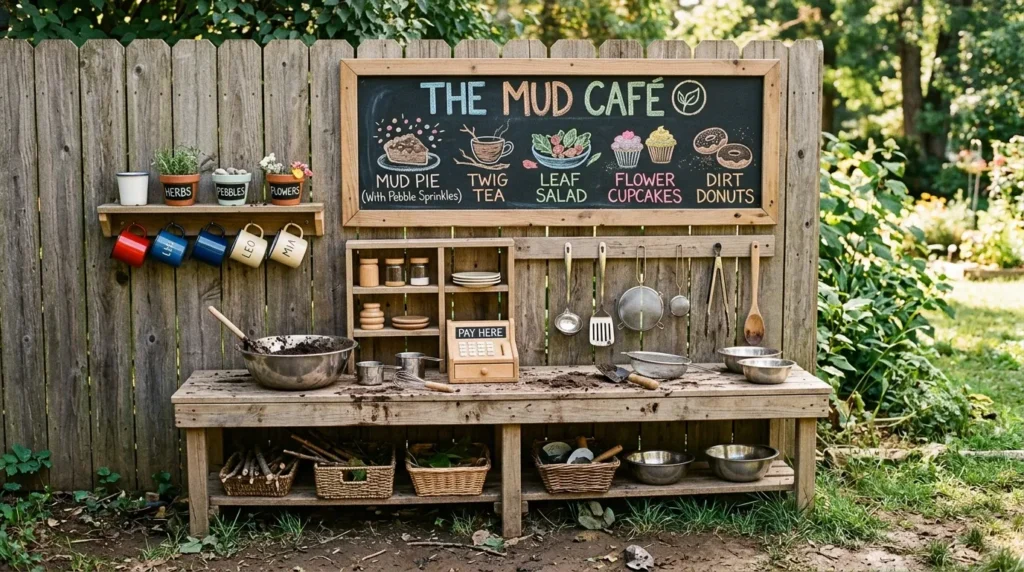
7. Chalkboard Café
- Adds pretend restaurant and bakery play
- Encourages writing, drawing, counting, and naming
- Works with chalk paint, boards, or fence panels
- Makes the setup look styled and finished
A chalkboard café gives the mud kitchen personality in minutes. Mount a weather-safe chalkboard above the counter or on a nearby fence, then let children draw menus, write pretend prices, name recipes, and decorate the space. This adds early literacy and storytelling without making the activity feel like school. Use outdoor chalkboard paint, a framed board, or a sealed wood panel. Keep chalk in a small covered container so it does not get ruined by rain, sprinklers, or overnight moisture.
The visual upgrade is big because the chalkboard creates a clear focal point. Parents can write prompts like “leaf soup,” “mud muffins,” “stone stew,” or “flower tea” to inspire play. Older siblings can take pretend orders or design the menu before a backyard playdate. The result feels charming, useful, and easy to refresh. It also makes a very simple mud kitchen look more intentional, which is helpful when you want the play area to feel cute without spending much money on decorations.
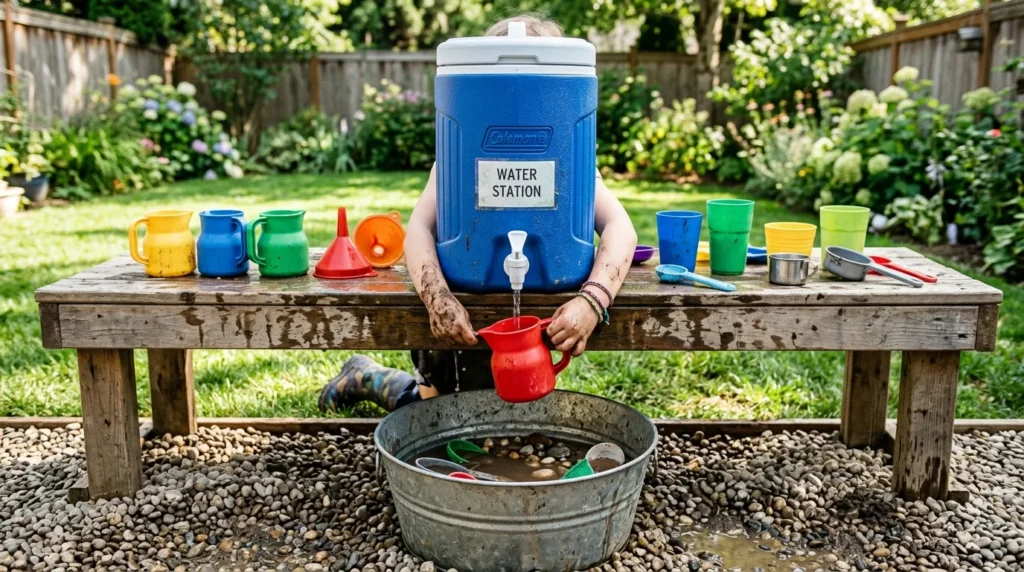
8. Water Jug Bar
- Adds pouring and rinsing without plumbing
- Works with camping jugs, buckets, pitchers, and dispensers
- Helps kids control small amounts of water
- Best placed over grass, gravel, mulch, or pavers
A water jug bar brings the whole play kitchen to life because water changes what children can create. Instead of installing plumbing, use a camping jug, drink dispenser, watering can, or bucket with a spout. Place it beside the mixing counter so kids can fill bowls, rinse stones, pour into funnels, and adjust the texture of their mud recipes. This keeps the setup quick, affordable, and easy to control. Smaller water sources also help prevent the backyard from becoming flooded within minutes.
The practical detail that matters most is drainage. Put the water area over grass, mulch, pea gravel, or washable pavers so spills have somewhere to go. Add basins, measuring cups, and pitchers to support pouring practice. The result feels interactive and realistic without becoming complicated. Kids can experiment with thick mud, watery soup, smooth mixtures, and pretend drinks. Parents get an outdoor sensory station that is easy to refill, easy to empty, and simple enough to create in a single afternoon.
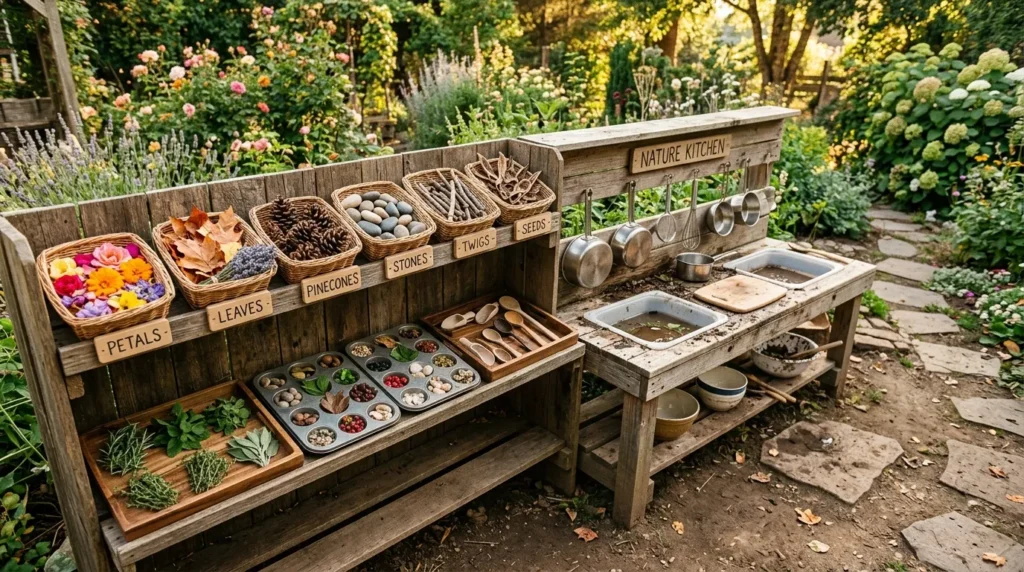
9. Nature Pantry
- Uses free backyard materials for pretend ingredients
- Works with leaves, petals, pinecones, stones, and herbs
- Encourages sorting, counting, decorating, and sensory play
- Easy to refresh by season without buying more toys
A nature pantry makes outdoor play richer because children get visible ingredients to choose from. Use shallow baskets, muffin tins, trays, or small bowls to organize leaves, petals, pinecones, smooth stones, grass, seed pods, and safe herbs. When materials are arranged clearly, kids naturally sort colors, compare textures, count pieces, and decorate pretend food. This works especially well because it uses things already available in many yards, parks, and garden spaces, making the kitchen feel connected to the outdoors rather than filled with plastic toys.
The best part is that the pantry can change with the seasons. Spring can bring petals and mint, summer can bring grass and shells, fall can bring colorful leaves and acorns, and winter can bring evergreen pieces or smooth stones. Avoid poisonous plants, treated mulch, sharp sticks, and small choking hazards for younger children. The result is low-cost, beautiful, and endlessly reusable. It also makes the play area look more styled because natural textures photograph beautifully against wood, metal bowls, and garden backdrops.
10. Muffin Tin Bakery
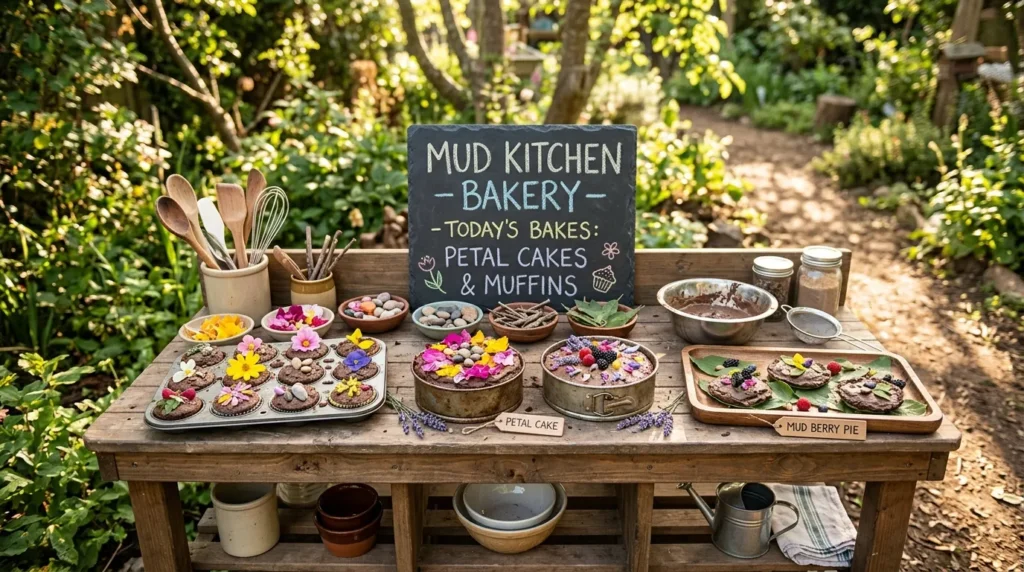
- Creates focused pretend baking play
- Uses muffin tins, trays, spoons, and natural toppings
- Encourages scooping, filling, arranging, and decorating
- Great for younger kids and playdates
A muffin tin bakery gives children an easy theme that makes mud play feel purposeful. Set out old muffin tins, cake pans, silicone molds, spoons, spatulas, and trays so kids can scoop mud into sections and decorate each one. Add petals, pebbles, leaves, and grass as toppings. This setup works because the divided spaces guide play without limiting imagination. Children can make cupcakes, pies, cookies, pancakes, birthday cakes, or bakery displays using the same simple tools again and again.
The finished station can be very cute with almost no extra spending. Add a small chalk sign, a serving shelf, and a basket labeled “toppings” to complete the pretend bakery feeling. Use washable, safe, non-sharp kitchen items that you no longer need indoors. The result is practical, engaging, and especially good for fine motor play. Kids practice filling, pressing, smoothing, decorating, and counting while having fun. It also works beautifully for siblings or friends because everyone can decorate their own muddy creation.
11. Mini Market
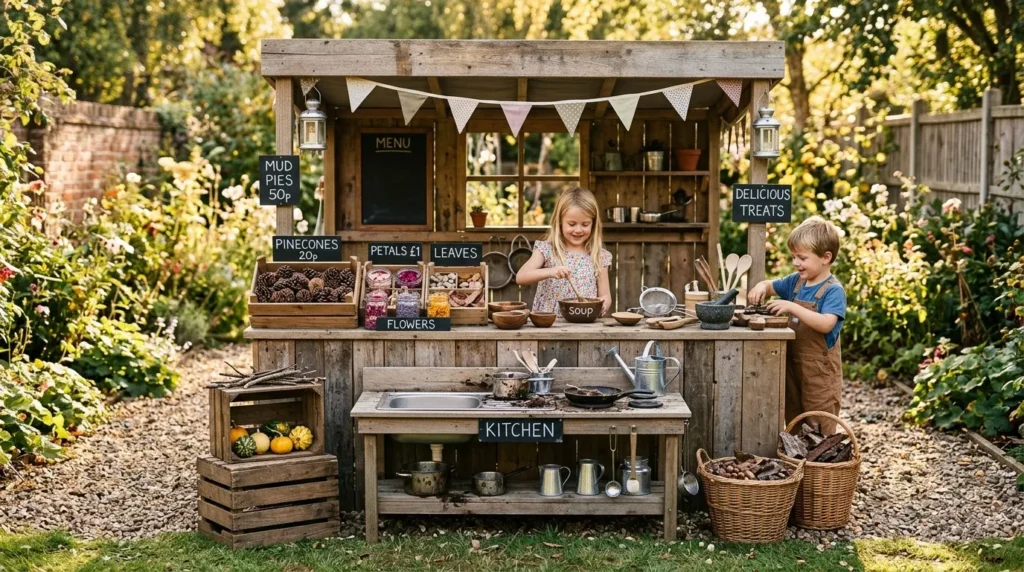
- Expands play into selling, serving, and sorting
- Uses crates, baskets, signs, jars, and trays
- Encourages role play, counting, sharing, and conversation
- Perfect for siblings, neighborhood friends, and parties
A mini market turns the mud kitchen into a bigger imaginative world without adding much work. Use crates as display shelves, baskets for leaves, jars for petals, and trays for mud pies or pretend treats. Add a small sign that says “market,” “bakery,” or “garden café.” Children can cook, arrange, sell, serve, and trade their creations. This works especially well when several kids are playing because each child can choose a role instead of crowding around one mixing bowl.
The transformation is social and creative, which makes the play area feel new every time. Add pretend price tags, order cards, reusable cups, and a small serving shelf. Fall leaves can become cookies, pinecones can become muffins, and stones can become pretend vegetables. This idea grows with children because younger kids enjoy scooping, while older kids build stories around the market. The result is organized, playful, and perfect for backyard gatherings when you want an activity that keeps children busy without constant adult direction.
12. Cleanup Corner
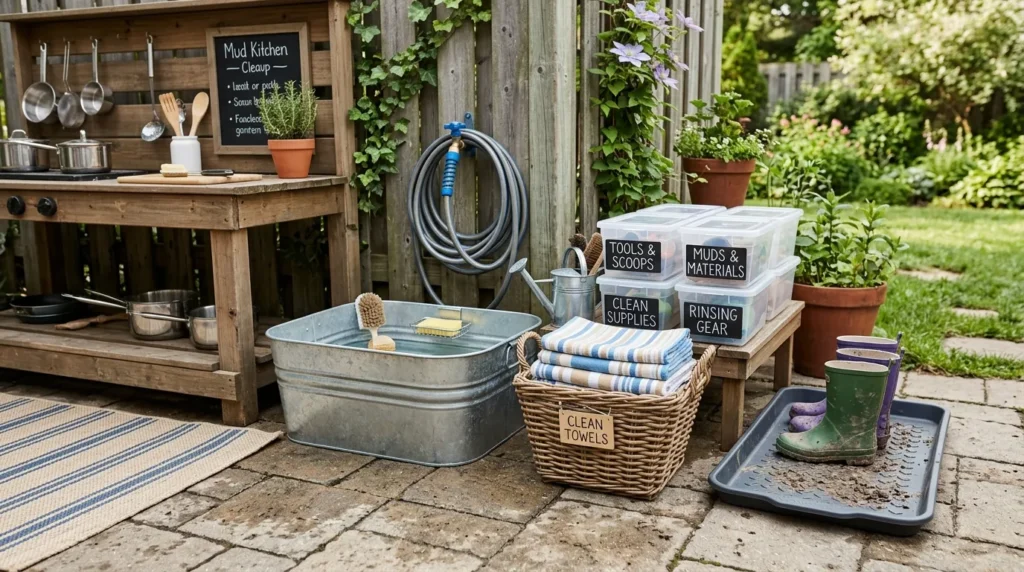
- Keeps muddy tools and hands from spreading mess
- Works with rinse buckets, towels, mats, and storage bins
- Helps children learn reset routines after play
- Makes parents more likely to allow messy outdoor play
A cleanup corner makes the mud kitchen easier to live with, which is why it deserves planning from the start. Place a rinse bucket, towel basket, boot tray, or washable outdoor mat near the play area. Children can rinse spoons, drop muddy tools into one bin, and wipe hands before walking across the patio or heading indoors. In my experience, families use outdoor play spaces more often when cleanup feels predictable instead of turning into a stressful surprise every afternoon.
The setup can still look attractive if the materials match the kitchen. Use a galvanized tub, woven basket, neutral outdoor mat, or labeled storage bin to keep everything tidy. Teach children to place muddy tools in one container and clean tools in another. The result is practical, parent-friendly, and surprisingly important for daily use. It protects decks, doors, and floors from mud while giving kids responsibility for resetting their space. A good cleanup corner helps the project stay fun instead of becoming another household headache.
13. One Day Layout
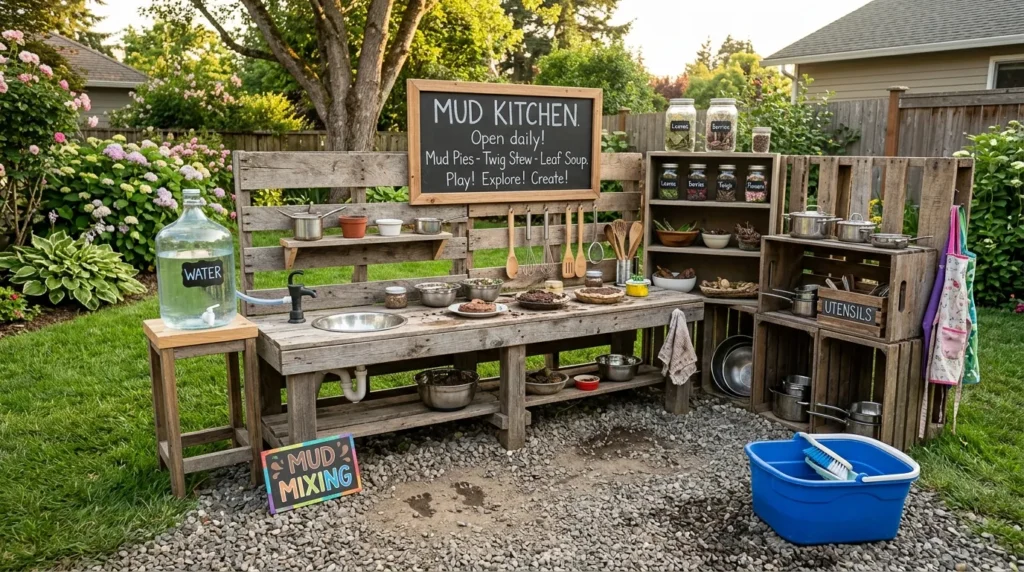
- Combines counter, sink, storage, water, and cleanup
- Helps you finish the project without overcomplicating it
- Works with pallets, crates, bowls, hooks, and bins
- Creates a complete backyard play zone fast
A one day layout keeps the project manageable because it focuses on the essentials first. Choose one counter, one removable sink, one water source, one storage area, and one cleanup zone. That is enough to make the play kitchen feel complete without building a huge structure. Start by placing the counter, then add the sink bowl, tool hooks, water jug, and nature pantry. When the basic flow works, you can add details like a chalkboard sign or mini market shelf later.
The finished layout should make sense for real movement. Children need space to stand, scoop, pour, wash, and carry items without bumping into furniture or slipping through puddles. Place muddy play over grass, mulch, gravel, or washable pavers, and keep storage at child height. If you want to Build a Mud Kitchen quickly, this simple layout prevents overthinking and keeps the focus on play. The result is complete, useful, and ready for children to enjoy the same day you set it up.